How to Make Ahri Cosplay Ears: Easy DIY Guide
How to Make Ahri Cosplay Ears: Easy DIY Guide
Ever tried to buy cosplay ears online only to find them too expensive or not authentic enough? Finding that perfect, dynamic accessory for your Ahri cosplay can be a real challenge. You want something that captures her iconic charm without breaking your budget or looking flimsy.
This guide helps you create your own Ahri cosplay ears step by step right at home. It’s an affordable, customizable, and con-ready approach. League of Legends' Ahri remains a fan favorite, and her distinctive ears are central to her enchanting look.
This 2025 beginner-friendly, eco-conscious tutorial focuses on authenticity and sustainability. You will learn about selecting the best materials for cosplay ears, precise crafting techniques, and pro tips for achieving realistic results. We will also cover cost-saving strategies to make your DIY cosplay ears project a success.
Why Ahri Cosplay Ears Matter
Ahri's appeal in League of Legends is undeniable. Her sharp wit and captivating design have solidified her as one of the game's most iconic champions. For many cosplayers, Ahri isn't just a character; she's a creative canvas.
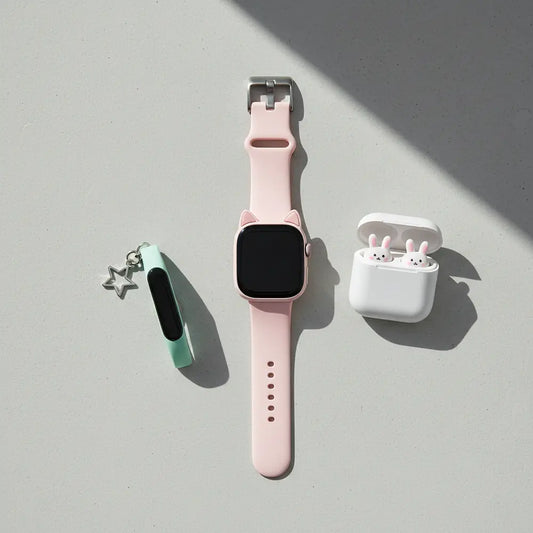
Her distinctive fox ears are more than just an accessory. They are a signature element, crucial for instantly recognizable authenticity. Without them, an Ahri cosplay might feel incomplete, lacking that spark that truly brings the Vastayan mage to life.
Cosplayers often face a dilemma: pre-made ears can be expensive, ranging from $40 to over $100 for decent quality. They might not perfectly match your wig, or their construction can feel flimsy. This uncertainty leaves many wondering how to achieve the ideal look.
These challenges highlight why mastering how to make Ahri cosplay ears yourself is so valuable. It grants you full creative control, ensuring your ears are authentic, comfortable, and tailored to your vision. Crafting them yourself also means they truly stand out in competitions, often catching judges' eyes.
Materials You’ll Need (2025 Updated List)
Choosing the right materials is the first step to creating stunning Ahri ears. This updated list balances affordability, realism, and eco-friendliness for your 2025 DIY cosplay ears project. Think about both the structure and the aesthetic finish.
Core Structure Choices
The foundation of your ears needs to be lightweight yet sturdy.
- Craft Foam (EVA Foam): An affordable, lightweight option that’s easy to cut and shape. It provides a firm structure without adding bulk. Look for thicknesses between 2mm-5mm.
- Wire (Galvanized Steel or Aluminum): Offers flexibility for intricate shapes and can be easily bent. However, it requires more padding to ensure comfort and hide its form. Many beginners start with foam for simplicity.
- Headband: A plain, sturdy plastic or metal headband will serve as the anchor. Choose one that fits comfortably on your head, as this will be worn for hours. Comfort is crucial for conventions.
Aesthetic & Texture Materials
These elements bring your Ahri ears to life, adding fur and color.
- Faux Fur Fabric: This is where the magic happens. Look for high-quality faux fur with a good pile length (typically 1-2 inches) in white, cream, or a light tan. For Ahri, a natural fox fur texture works best.
- Felt or Fleece: Useful for the inner ear lining or to reinforce areas. It provides a soft, opaque backing for your fur.
- Fabric Adhesive/Hot Glue: A strong fabric adhesive (like E6000) offers a durable bond for fur. Hot glue is faster and perfect for initial placement or less critical areas. Consider the drying time.
- Acrylic Paints/Fabric Markers: For shading and adding depth to the fur tips or inner ear details. Earthy tones like brown, gray, or soft orange are ideal.
- Hair Clips (Optional): If you prefer clip-on ears or need extra security, strong alligator clips can be integrated.
Eco-Friendly Alternatives
As of 2025, sustainable crafting is increasingly popular.
- Recycled Felt: Made from recycled plastic bottles, it's a greener option for inner ear lining.
- Organic Cotton Fabric: If you're sensitive to synthetic fur, consider dyeing organic cotton to mimic fur texture. This requires more effort but significantly reduces environmental impact.
- Water-Based Adhesives: Opt for low-VOC (Volatile Organic Compound) glues for reduced environmental impact and better air quality.
When comparing costs, a DIY approach using foam and faux fur can be assembled for around $10-$25. This contrasts sharply with pre-made ears, which often start at $40 and can reach over $100 for those with high detail or movable parts. Sourcing materials from local craft stores often provides better value than specialized online cosplay suppliers, especially for beginners.
Download Your Ahri Ears Material Checklist!
Never forget a crucial item again. Get a printable list of all the materials you'll need for your DIY Ahri cosplay ears project, ensuring you're perfectly prepared before you start crafting.
Download ChecklistStep-by-Step: Building the Ear Base
The base is the skeleton of your Ahri ears. A strong, well-shaped foundation ensures your ears are sturdy, symmetrical, and comfortable. Don't rush this step, as it dictates the final form of your DIY cosplay ears.
-
1
Create Your Templates
Start by sketching your desired Ahri ear shape on paper. Ahri’s ears are typically large, pointed, and slightly curved. Think of a rounded triangle with a slightly concave inner curve. Print or draw two identical mirror-image templates.
Cut these templates out. A pro-tip: make one perfect template, then flip it to trace the second. This guarantees perfect symmetry, crucial for realistic fox ears cosplay.
-
2
Cut the Base Material
Lay your templates onto your chosen base material, whether it's craft foam or rigid felt. Trace around them with a marker. Using a sharp craft knife or scissors, carefully cut out two identical ear shapes. Precision here is key for clean edges.
If using foam, consider cutting two layers per ear and gluing them together for added thickness and stability. This gives a more substantial feel, akin to real fox ears.
-
3
Shape the Ears (Optional for Foam)
For a more natural, slightly curved ear, gently heat your foam pieces with a heat gun or even a hairdryer on a low setting. As the foam softens, carefully bend and mold it into a subtle concave shape. Hold the shape until it cools to set.
This technique adds dynamism, making your Ahri ears look less flat and more lifelike. It mimics the natural curve of an animal's ear.
-
4
Attach to the Headband
Position your foam or wire ear bases on your chosen headband. Experiment with placement; typically, Ahri's ears sit slightly forward on the head, above the temples. Mark their positions with a pencil.
Use strong fabric adhesive or hot glue to secure the bases to the headband. For foam, apply glue generously to the bottom edge of the ear and press firmly onto the headband. Hold in place until set. If using wire, wrap the wire securely around the headband, then reinforce with glue.
-
5
Reinforce and Test
Once the glue is dry, gently test the stability of your ear bases. Try on the headband and check the positioning in a mirror. You might add small strips of felt or thin foam over the connection points for extra reinforcement and a smoother transition. This provides a clean finish and prevents wobbling.
This "building a house" approach to your ears ensures a sturdy foundation. Most beginner mistakes happen here, like uneven sizing or weak attachments. Taking your time now prevents issues later on.
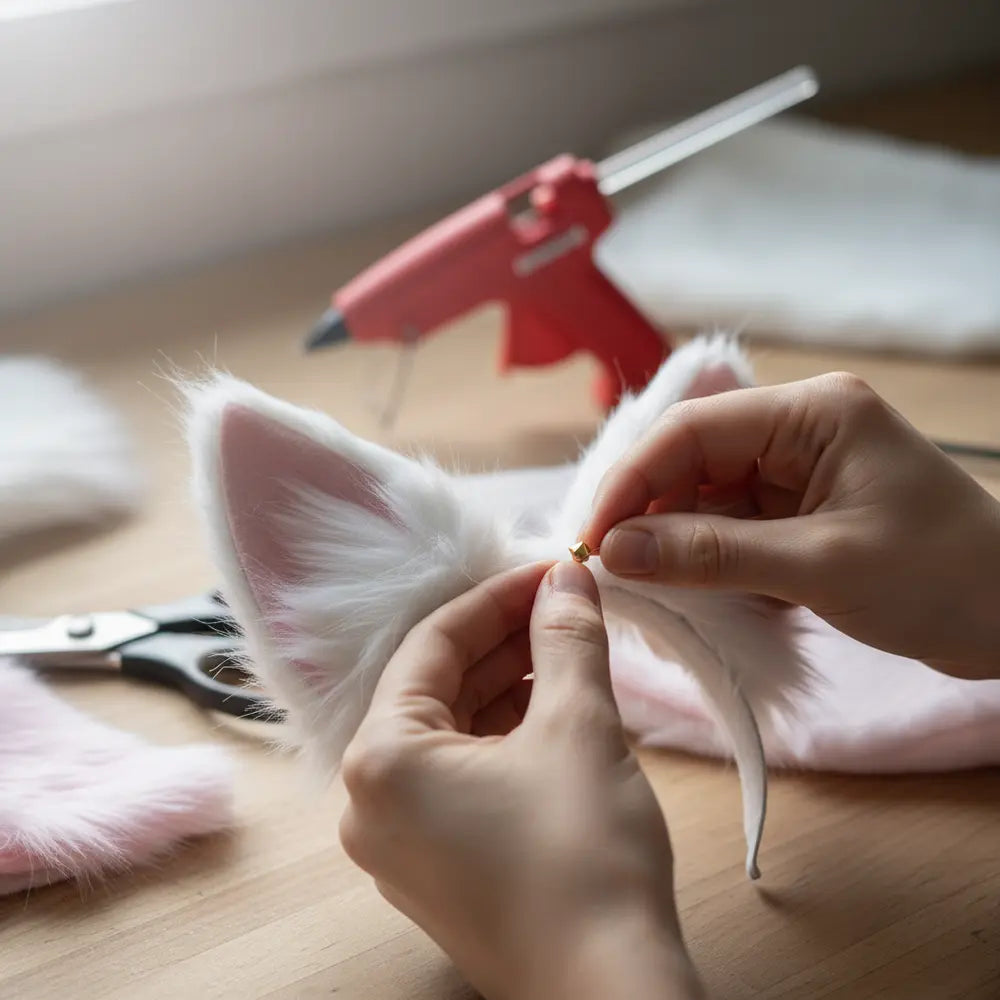
Adding Fur and Texture for Realism
Bringing your Ahri ears to life means adding lush, textured fur. This stage is where your DIY cosplay ears transition from simple shapes to truly believable fox ears. The goal is a plush, natural look that blends seamlessly with your wig.
1. Selecting the Best Faux Furs
For Ahri, you’ll want a high-quality faux fur with a moderate to long pile (typically 1-3 inches). Look for fur that has a natural sheen and movement. Common choices include:
- Long Pile Fox Fur: Excellent for the main body of the ears, offering that fluffy, luxurious Ahri look. White, cream, or light beige are common base colors.
- Short Pile Fur/Felt: For the inner ear, a shorter pile or even felt in a contrasting color (like a darker brown or a deep cream) adds definition and mimics natural ear markings.
A common misconception is that any faux fur will do. However, the quality of your fur dramatically impacts the final realism. A side-by-side comparison of ears made with flat, budget fur versus layered, high-quality fur immediately shows the difference. The latter boasts depth and movement.
2. Cutting the Fur Pieces
This step is critical to prevent shedding and achieve a natural look.
- Pattern Transfer: Place your ear base templates onto the back of your faux fur fabric. Remember to account for seam allowance if you plan to sew, or simply trace the ear shape if you're gluing directly. Cut out two outer ear pieces (main color) and two inner ear pieces (contrast color/short pile).
- Cutting Technique: Always cut faux fur from the back side, using a craft knife or the very tips of sharp scissors. Only cut the fabric backing, avoiding the fur fibers as much as possible. This prevents a blunt-cut look and keeps the fur pile intact for blending.
3. Layering Technique for Depth
Layering creates the illusion of natural fur growth, adding volume and realism.
- Outer Ear: Start by gluing the main faux fur pieces to the outside of your ear bases. Apply adhesive around the edges of your foam base, then carefully press the fur onto it, making sure the fur direction (the 'nap') flows naturally upwards and outwards.
- Inner Ear: Once the outer fur is secure, trim the fur around the inner ear section to create a clean line. Then, glue your contrasting inner ear pieces (short pile fur or felt) into this trimmed area. This creates a distinct, defined inner ear.
- Overlap and Blend: Allow a slight overlap of the outer fur over the inner ear piece. This creates a soft, natural transition, almost like sculpting the fur.
4. Blending with the Wig and Headband
For an integrated look, your Ahri ears need to blend seamlessly.
- Wig Integration: Position the ears on your Ahri wig while it’s on a mannequin head or a stand. Use small amounts of hairspray or clear gel to gently blend the wig hair around the base of the ears. This hides the headband and makes the ears appear to sprout naturally from the wig.
- Brushing and Shaping: Once all fur is glued, use a pet slicker brush or a fine-tooth comb to gently brush out the fur. This removes loose fibers, fluffs up the pile, and helps to shape the fur into the desired Ahri ear silhouette. A pro-level tip is to slightly trim the fur around the edges to refine the shape, but do so sparingly and carefully.
This meticulous approach to fur application gives your realistic fox ears cosplay the professional finish it deserves.
Beyond the static beauty of Ahri's ears, the world of cosplay technology is constantly evolving. Curious about how some animal ears achieve dynamic movement? For a fascinating glimpse into the adorable tech that brings ears to life, exploring motion-activated wonders:
What Are Moving Cat Ears?Securing the Ears: Comfort and Durability
One of the most common cosplay frustrations is an accessory that constantly slips, wobbles, or becomes uncomfortable during long convention days. Ensuring your Ahri ears are secure and comfortable is as vital as making them look great. This section addresses how to attach cosplay ears securely, keeping them in place from morning to night.
Headband vs. Clip-On Mechanisms
Choosing your attachment method impacts both comfort and security.
- Headband Attachment: This is the most common method for Ahri ears. The ears are permanently affixed to a sturdy headband. The advantage is stability and easy wear; simply slide it on. The downside is that the headband might be visible depending on your wig styling. For a comfortable fit over hours, select a headband with soft padding on the underside or add your own felt lining.
- Clip-On Mechanisms: Using strong alligator clips or snap clips allows for more flexible placement. The ears can be clipped directly into your wig hair. This is excellent for specific styling or if you want to reuse the ears with different wigs. The challenge is ensuring the clips are strong enough to hold the weight of the ears without slipping, especially if they are large. Many cosplayers use both: a headband for primary support, with small clips for extra anchoring to the wig.
Comfort for Long Convention Wear
Conventions often mean 8-12 hours in cosplay. Ear comfort is paramount.
- Padding: Ensure any part of the ear base or headband that touches your head is padded. Thin foam, felt, or even moleskin can be glued to the underside of the headband. This prevents pressure points and chafing.
- Lightweight Materials: Opting for craft foam over heavier materials for the base significantly reduces the overall weight. Lighter ears put less strain on your head and neck, allowing for longer wear.
- Proper Fit: A headband that's too tight will cause headaches, while one too loose will slip. Test the fit extensively at home before your event. Walk around, nod your head, and even do a quick "wiggle test" to see how they hold up.
Reinforcement Techniques
Imagine your Ahri ears failing mid-event – a nightmare scenario. Reinforcement prevents this.
- Adhesive Layers: Don't just rely on one layer of glue. After the initial attachment to the headband, apply a second, thin layer of fabric glue or E6000 around the base of the ears where they meet the headband. This creates a stronger, more flexible bond.
- Stitching (for Fabric Headbands): If using a fabric-covered headband, small, discreet stitches through the ear base into the fabric can provide incredible durability. This is especially useful for heavier ears.
- Hidden Wires/Brackets: For advanced crafters, small, bendable wires can be embedded into the ear base and then wrapped around the headband for extra structural support. This is like adding rebar to a concrete structure.
- Wig Anchors: Sew small loops of elastic or fabric into your wig near where the ears sit. You can then thread thin wire or fishing line through these loops and around your ear bases, essentially "sewing" the ears into the wig. This makes the ears incredibly secure.
A friend once had an Ahri ear detach entirely during a cosplay skit, a common issue stemming from insufficient reinforcement. Learning how to attach cosplay ears securely from the start saves you stress and ensures your hard work stays put. If you're seeking a premium, robust solution that offers adjustable features and inherent durability right out of the box, explore a meticulously handcrafted set that promises luxury and flexibility:
For those who find the crafting process too time-consuming, or desire a pre-made, high-quality solution, this luxe set offers inherent durability and adjustability for an exquisite finish.
Fox Cosplay Ears & Tail Set - Luxe Adjustable Faux FurFinishing Touches: Accuracy and Styling
The difference between good handmade cosplay ears and truly outstanding ones often lies in the finishing touches. This stage focuses on adding intricate details that elevate your Ahri ears from simple props to works of art, perfectly matching her aesthetic across various skins.
Painting and Shading Details
Adding subtle color variations and shading brings incredible depth and realism to your fur.
- Airbrushing: For a truly professional finish, an airbrush allows for fine misting of paint, creating soft, natural gradients. Use diluted acrylic paints in shades of brown, gray, or dark orange to define the tips, create shadows along the edges, or add markings that mimic real fox fur. This technique avoids a harsh, painted look.
- Dry Brushing: If you don't have an airbrush, dry brushing with a stiff brush and a small amount of acrylic paint can achieve similar results. Lightly brush the paint onto the fur tips or edges, working in the direction of the fur nap. This adds dimension without saturating the fur.
- Inner Ear Shading: For the inner ear, a slightly darker shade of paint or even a touch of blush makeup can add a natural flush or depth.
A common misconception is that fur color alone is enough. However, real animal fur is rarely a single, uniform color. Adding subtle highlights and lowlights mimics natural variations, making your ears appear far more authentic.
Pairing with Ahri Wig
Your Ahri ears and wig should look like one seamless piece.
- Color Matching: Ensure your ear fur color complements your Ahri wig. For instance, a classic Ahri often uses a dark brown or black wig with white-tipped ears. K/DA Ahri might feature a lighter wig with more vibrant ear colors.
- Placement: Experiment with where the ears sit on your wig. Generally, they should be slightly forward on the head, high enough to be visible but not so far back they disappear into the wig. Use hair clips or bobby pins under the wig cap to secure the headband in place.
- Styling Around the Base: Gently style the wig hair around the base of the ears. Use hairspray or styling gel to smooth the wig hair over the headband, creating a natural transition. This hides the attachment points and makes the ears appear to sprout directly from Ahri’s head.
Matching to Ahri’s Skins
Ahri has many stunning skins, each with unique ear designs. Customizing your League of Legends Ahri cosplay tutorial to a specific skin adds another layer of authenticity.
- Classic Ahri: White fur with dark tips, often with a slight curve.
- K/DA Ahri: Ears often have subtle pink or purple undertones, with a sleek, modern silhouette. Some versions are even iridescent.
- Spirit Blossom Ahri: Feature translucent, ethereal elements, often with soft glowing effects. You might use iridescent fabrics or even embed small LED lights.
- Star Guardian Ahri: Her ears are often more stylized, with vibrant pinks and whites, sometimes incorporating star motifs.
- Dynasty Ahri: Features a more traditional, refined fox ear shape, typically in muted, elegant tones.
Consider a visual reference chart of your chosen Ahri skin, paying close attention to the ear shape, color palette, and any unique features. For example, K/DA Ahri’s distinct, often glowing ear tips require specific materials like iridescent fabric or careful painting, setting them apart from the more natural look of Classic Ahri.
Which Ahri Skin Are You Most Excited to Cosplay?
Let us know your favorite Ahri look and inspire fellow crafters!
Budget vs Premium: Cost Comparison
Understanding the financial investment for your Ahri cosplay ears step by step project helps manage expectations and make informed choices. The cost difference between DIY and pre-made options, or even between budget and premium DIY materials, can be substantial. This section breaks down the costs involved.
DIY vs. Pre-Made Cost Analysis
The primary advantage of crafting your own ears is cost savings.
-
DIY Budget Option:
- Craft Foam/Cardboard: $5 - $10 (for a large sheet)
- Faux Fur Scraps: $5 - $15 (from remnants or small cuts)
- Headband: $2 - $5
- Hot Glue Sticks/Fabric Adhesive: $5 - $10
- Paints/Markers: $5 - $10 (if you don't already have them)
- Total Estimated Cost: $22 - $50
- Value: Highly customizable, unique, satisfaction of making it yourself.
- Time Investment: 4-8 hours for beginners.
-
Pre-Made Options:
- Basic Online Ears: $20 - $40 (often simple, less detailed, potentially lower quality fur)
- Mid-Range Cosplay Ears: $40 - $80 (better fur, more defined shape, but still generic)
- High-End/Artisan Ears: $80 - $200+ (hand-sculpted, premium fur, often poseable, sometimes with electronic features)
- Total Estimated Cost: $20 - $200+
- Value: Convenience, ready-to-wear, professional finish (for high-end).
The data clearly shows that DIY cosplay ears can save you over 50% compared to even mid-range pre-made options. This allows you to allocate more of your budget to other costume elements like Ahri's iconic nine tails or the wig itself.
Hidden Costs (Tools, Adhesives, etc.)
While the material list covers the basics, beginners might overlook initial tool investments.
- Cutting Tools: Sharp craft knife or precision scissors ($10 - $25)
- Heat Gun/Hairdryer: ($20 - $50, if you don't own one)
- Brushes/Applicators: ($5 - $15)
- Safety Gear: Cutting mat, gloves ($10 - $20)