Best 3D Printers & Servo Kits for Animatronic Cosplay Ears (2025 Guide)
Why Animatronic Ears Are the Next Big Upgrade in Cosplay
You’ve spent months perfecting your fursuit. The vision is flawless, the craftsmanship is clean, but something is missing. The ears are static, lifeless. You see other creators online with builds that react and twitch, bringing their characters to life, and you know that’s the upgrade you need. But a quick search for parts throws you into a confusing world of industrial specs and generic tech reviews.
Most guides don’t understand the unique challenges of cosplay. You need parts that are not only functional but also durable enough to survive a crowded convention hall. They need to be quiet enough not to ruin a photoshoot and portable enough to wear for hours. This isn't about building a factory robot; it's about creating magic.
This guide cuts through the noise. We've built this 2025 buyer's guide specifically for animatronic cosplay and fursuit ears. We’ll provide clear, actionable recommendations for the best 3D printers, servo motor kits, and control systems.
You'll learn where to find reliable STL files and get a step-by-step overview of the building process. By the end, you’ll have the confidence to choose the right gear and bring expressive, moving ears to your next creation.
The buzz at conventions and on social media is undeniable. Animatronic elements are transforming high-end cosplay from static costumes into interactive experiences. Moving ears, in particular, add a layer of personality and realism that captures everyone's attention. What was once a niche, high-tech skill is rapidly becoming more accessible.
Viral videos on TikTok and Instagram from events like Anthrocon showcase fursuits with ears that perk up, droop, and twitch in response to their environment. This level of expression creates a powerful connection with the audience. It’s the difference between a costume and a character coming to life.
Fueling this trend is the growing availability of affordable and well-designed STL files. Expert creators are now sharing their mechanism designs, allowing more cosplayers to join the robotics movement. Searches for terms like animatronic furry props have surged, proving this is more than a fad—it's the new standard for immersive character creation. This move toward dynamic costumes mirrors other trends in the community, just as we've seen in the rising popularity of wearable tails. For a deeper look into that phenomenon, you can explore our analysis of why cosplay fox tails are trending beyond conventions, which shows a similar pattern of creative expression.
Best 3D Printers for Animatronic Cosplay (2025 Edition)
Choosing the best 3D printer for animatronic cosplay isn't about finding the most expensive machine. It’s about matching the features to a cosplayer’s unique needs: a build plate large enough for ear bases, quiet operation for late-night printing in an apartment, and reliability that won't let you down the week before a con.
Printer Showdown: Feature Comparison
1. Prusa MK4: The Reliable Workhorse
The Prusa MK4 is legendary for its consistency. For cosplayers, this translates to fewer failed prints and less wasted time and filament. It just works. Its print quality is exceptional out of the box, producing smooth surfaces that require minimal post-processing for your ear mechanisms.
A common misconception is that the MK4 is "slow" compared to newer rivals. While its top speed isn't the highest, its accuracy and automatic first-layer calibration mean you spend more time printing and less time tinkering. Think of it as the dependable workhorse that delivers a perfect print every time.
2. Creality K1: The High-Speed Budget King
If speed is your priority, the Creality K1 is a phenomenal choice. It brings core-XY printing speeds, once reserved for high-end machines, to a much more accessible price point. This printer is ideal for rapidly prototyping different ear designs or linkage parts in a single afternoon.
Think of the K1 as the sports car of budget printers. It’s incredibly fast and capable, but it might require a bit more fine-tuning to achieve perfect results compared to the Prusa. Its enclosed frame is a major advantage for printing with temperature-sensitive materials like ABS, which offer superior durability for internal parts.
3. Bambu Lab P1S: The All-in-One Powerhouse
The Bambu Lab P1S strikes a perfect balance between speed, quality, and user-friendliness. It’s known for being incredibly fast—capable of cutting print times by over 50% compared to older models. For cosplayers on a deadline, this is a game-changer.
The "S" model comes fully enclosed, making it ideal for printing engineering-grade filaments like PETG and ABS for maximum durability. A key feature is its optional Automatic Material System (AMS), which allows for multi-color printing. You can print internal support structures in a different color or even create custom-colored decorative elements for your ears.
Community Poll: Which 3D Printer Do You Trust for Cosplay?
Choosing the Right Servo Motor Kit for Animatronic Ears
Your servos are the muscles of your animatronic ears. Choosing the right servo motor kit for animatronic ears is critical for performance and longevity. The wrong choice can lead to weak, jittery movements or a loud whining noise that ruins the illusion. You need to focus on three key factors: torque, gear material, and noise level.
Key Servo Specifications Explained
-
Torque: This is the servo's rotational strength. It’s like the muscle power needed to lift the weight of the ear and its fur covering. Too little torque, and your ears will droop or struggle to move. For most ear sizes, a servo with 1.8-2.2 kg/cm of torque is a safe bet.
-
Gear Material: Servos come with either plastic or metal gears. For any part that will experience stress—like the main pivot of an ear—metal gears (MG) are non-negotiable. Plastic gears will strip after a few bumps at a convention, leading to a frustrating failure.
-
Digital vs. Analog: Digital servos offer more precise control and higher holding torque, but they are more expensive and can produce a high-frequency whine. Analog servos are cheaper and quieter at rest, making them an excellent choice for most ear projects.
Top Servo Kit Recommendations for 2025
- Tower Pro MG90S Metal Gear Micro Servos: This is the gold standard for cosplay animatronics. They offer an excellent balance of torque, durability, and affordability. Buying them in a pack of 4 or 10 provides you with spares for future projects or repairs. They are small, powerful, and known for their reliability.
- DS-Power Digital Servos: If you need higher precision for very subtle movements or are building larger, heavier ears, upgrading to a digital servo is a good move. They provide better holding power, meaning the ears won't "wobble" when held in one position.
- Specialty Cosplay Bundles: Some sellers on platforms like Etsy curate kits specifically for cosplay robotics. These often include servos, mounting hardware, and extension wires, saving you the trouble of sourcing parts individually.
Where to Find the Best STL Files for Animatronic Fursuit Ears
You don't need to be a 3D modeling expert to build animatronic ears. A thriving community of creators offers a wide range of pre-made designs. Knowing where to download animatronic ear STL files that are reliable and well-documented is the first step to a successful build.
Trusted Marketplaces for STL Files
- Printables.com: Known for its high-quality models and active community, Printables is an excellent source for free, tested designs. Many creators include detailed printing instructions and assembly guides.
- Etsy: For premium, highly supported designs, Etsy is a top destination. While these files are paid, you are often buying a complete package. This can include a PDF guide, a parts list, and direct support from the creator if you run into issues.
- Cults3D: This marketplace features a mix of free and paid designs, often from professional 3D artists. You can find highly realistic and intricate ear mechanisms here.
Free vs. Paid Designs: A Common Misconception
Many newcomers assume free files are lower quality. While some may be, the bigger difference is often the level of support. A free file from Thingiverse might be a brilliant design but come with zero instructions. Paying a few dollars for one of the best STL files for animatronic fursuit ears on Etsy often gets you a product that has been tested by dozens of other users.
To make an informed choice when selecting a design, it's beneficial to grasp the fundamentals of how these devices function. To help with this, our detailed article explores the question, "What Are Moving Cat Ears?". It breaks down the core concepts and technology, helping you better evaluate which STL files will truly meet your performance and aesthetic needs.
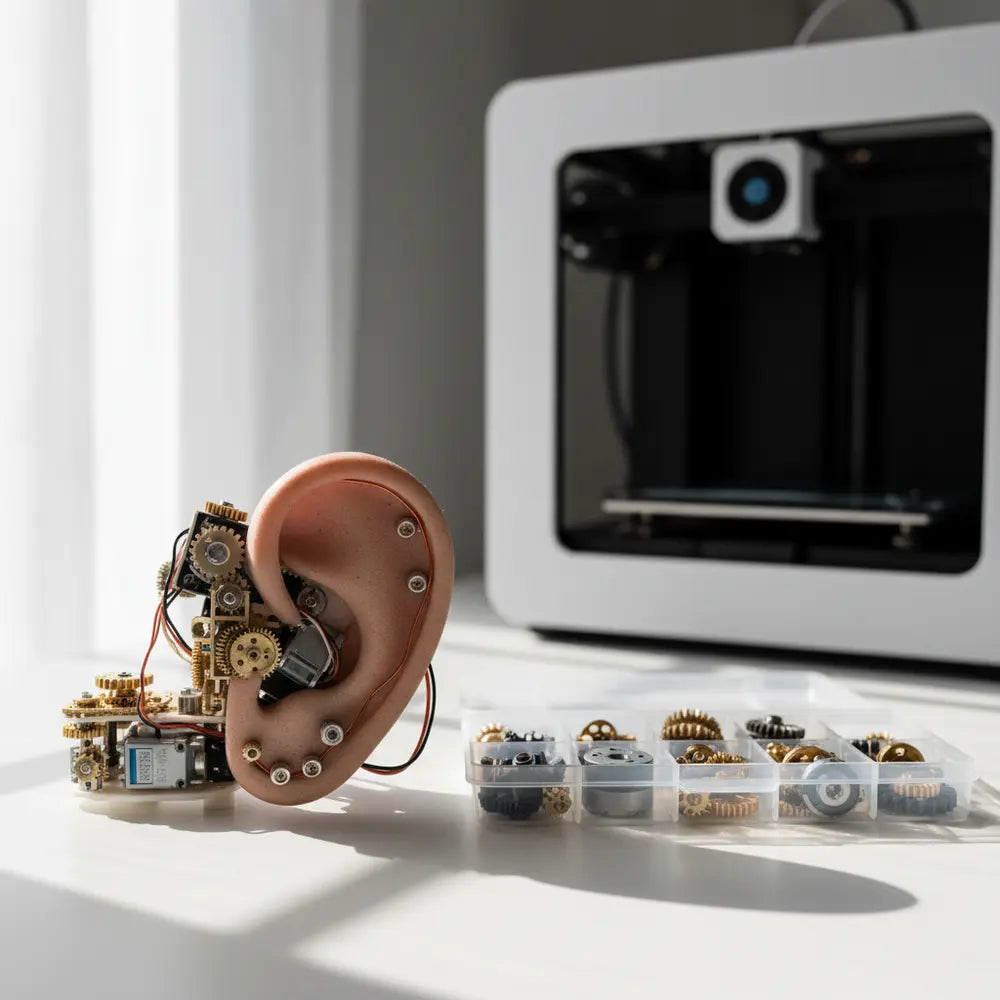
DIY Fursuit Ear Mechanism: Step-by-Step Tutorial
You have your printed parts and your servo kit. Now it's time to bring them together. This DIY fursuit ear mechanism tutorial provides a high-level overview of the assembly and programming process. Think of your Arduino as the brain, the servo as the muscle, and your code as the simple commands that create motion.
3D Printing Your Components
Success starts with a good print. For animatronic parts, PETG is an excellent filament choice, offering a great balance of strength and flexibility. It's more durable than standard PLA.
- Infill: Use an infill of 20-25%. This makes the parts strong without being excessively heavy or rigid.
- Supports: For complex shapes with overhangs, use "tree" or "organic" supports in your slicer software. They are easier to remove and leave a cleaner surface finish.
- Orientation: Pay close attention to the recommended print orientation in the STL file's instructions. Printing a part on its side versus flat can dramatically change its structural strength.
Assembling the Servo and Linkages
Patience here is key. Do not force parts that don't fit. A little bit of sanding on the joints can make the difference between a jerky mechanism and a smooth, fluid one.
Basic Arduino Animatronic Ear Control
The Arduino is a mini-computer that you'll program to control the servos. Don't be intimidated by the code; a basic ear-twitch program is surprisingly simple. You'll use the built-in `
A simple program involves three commands:
- `earServo.attach(9);` — This tells the Arduino that a servo is connected to pin 9.
- `earServo.write(45);` — This tells the servo to move to the 45-degree position.
- `delay(1000);` — This tells the program to wait for 1000 milliseconds (1 second).
By combining `write()` and `delay()` commands, you can create sequences for twitching, drooping, and perking up. For a complete walkthrough with wiring diagrams and copy-paste code examples, the go-to resource is our comprehensive guide. It provides the detailed guidance needed to master this step from start to finish.
View the Full DIY Moving Cat Ears TutorialTips for Durability and Convention Readiness
Building animatronic ears is one thing; making them survive a three-day convention is another. Durability, battery management, and noise control are what separate a good prototype from a great cosplay accessory. These 3D printing tips for animatronic mechanisms will help you "con-proof" your creation.
Reinforcing Your Prints for the Real World
Conventions are chaotic. Your ears will get bumped. To prevent a catastrophic failure, reinforce key stress points. After assembly, apply a small amount of super glue or two-part epoxy to the joints where linkage arms connect. For printed parts with seams, you can use a soldering iron with a flat tip to carefully "weld" the plastic together for a much stronger bond.
Mastering Battery Life
Will your ears last a whole day? A typical two-servo ear setup can draw up to 1000mAh of power. This means a standard 5,000mAh USB power bank should give you 4-5 hours of continuous movement. To drastically extend this, you need to manage power intelligently.
Strategies for Noise Reduction
Nothing breaks the magic faster than a loud, grinding servo motor. While you can't eliminate the noise completely, you can dampen it significantly. Line the inside of the 3D printed ear shell with a small piece of soft foam or felt. This will absorb the high-frequency whine of the motors. Also, ensure your mechanism moves freely; excess friction forces the servo to work harder, making it much louder.
Cost Breakdown: Affordable Animatronic Ear Builds
Building your own animatronic ears can be a highly rewarding project, but what's the real cost? The answer depends heavily on the gear you choose. An affordable animatronic ear build for fursuits is absolutely possible. Here’s a look at how the costs break down for a budget setup versus a premium one.
Interactive Build Cost Estimator
Use this calculator to estimate your project cost. Enter your component prices below. Choose '0' if you already own an item or are outsourcing printing.
The Printer: To Buy or To Outsource?
Your biggest initial investment is the 3D printer. A reliable entry-level printer like a Creality Ender 3 can be found for around $200. This machine is more than capable of producing the parts you need. This investment pays for itself quickly if you plan on creating more 3D printed cosplay props in the future.
Alternatively, you can outsource the printing. Using a service like Xometry or checking with your local library or makerspace can be a good option. Printing a full set of ear mechanism parts might cost between $40-$80, depending on the service and materials used.
Case Study: Budget Build vs. Premium Build
Let's compare two realistic scenarios:
- Printer: Creality Ender 3 V3 SE (~$200)
- Servos: Tower Pro MG90S 4-pack (~$15)
- Controller: Arduino Nano Clone (~$5)
- Filament: 1kg Spool of PLA+ or PETG (~$20)
- Total: ~$240
This setup is perfect for a first-time builder. It provides everything you need to create a functional and durable set of animatronic ears without a massive financial commitment.
- Printer: Bambu Lab P1S (~$600)
- Servos: High-Quality Digital Servos (~$40)
- Controller: Genuine Arduino Uno R3 (~$25)
- Filament: Specialty PETG-CF Filament (~$50)
- Total: ~$715
This build is for the creator who values speed, precision, and a professional finish. The printer is a long-term investment that will handle any project you throw at it with incredible speed and quality.
The Hidden Costs of Cosplay Electronics
Remember to budget for the small but essential extras. These include a good quality USB power bank ($30-$40), flexible silicone wire ($10), heat shrink tubing for clean and insulated connections ($5), and various screws or adhesives. These small purchases add up but are vital for a polished and reliable final product.
Final Recommendations & Next Steps
You're now equipped with the knowledge to make informed decisions for your next big cosplay upgrade. We’ve covered the criteria, reviewed the top gear, and outlined the path to bringing your character to life. The key is to choose the tools that match your goals and budget.
Here are our final recommendations for 2025:
-
Best All-Around Printer: The Prusa MK4 is our top pick for its unmatched reliability and print quality. For those who prioritize speed and advanced features, the Bambu Lab P1S is a phenomenal investment.
-
Best Servo Kit for Durability: A multi-pack of Tower Pro MG90S metal gear servos provides the best combination of power, reliability, and value for nearly any animatronic ear project.
-
Top STL Sources to Start: Begin your search on Printables.com for excellent community-vetted files. When you're ready for a premium, fully-supported design, explore the talented creators on Etsy.
Your journey into cosplay robotics starts now. Find a design that sparks your creativity, download the STL files, and warm up your printer. The satisfaction of seeing your own creation twitch and react for the first time is an experience unlike any other.
If you'd prefer to start with a ready-to-wear option to understand the quality and feel, our definitive Best Moving Cat Ears for Cosplay in 2025 guide reviews top-tier products built with similar high-quality components and helps you find the perfect pair.
Frequently Asked Questions
1. How long does it take to build animatronic ears from scratch?
For a first-time builder, plan for a full weekend. The 3D printing itself can take 8-12 hours depending on your printer and settings. Assembly, wiring, and basic programming will likely take another 4-6 hours. Experienced makers can often complete the project in a single day.
2. Can I control animatronic ears with my phone?
Yes, but it adds complexity. This requires an Arduino board with Bluetooth capabilities (like an ESP32) and a companion app (like Blynk or LightBlue). While it allows for amazing custom control, beginners should start with pre-programmed movements triggered by a simple button before tackling wireless control.
3. What's the best 3D printer filament for durable cosplay parts?
PETG is the best all-around choice. It's nearly as easy to print as PLA but offers much better heat resistance and durability, making it less likely to warp or snap. For internal mechanism parts that need to be extremely rigid and strong, ABS or ASA are top-tier choices, but they require an enclosed printer to print reliably.
4. Are digital or analog servos better for animatronic ears?
For most cosplayers, high-quality analog servos (like the MG90S) are the better choice. They are more affordable, quieter when idle, and provide perfectly adequate speed and torque for ear movements. Digital servos are only necessary if you require extremely precise, repeatable movements and higher holding strength for very large or heavy ears.