Judy Hopps Cosplay Ears: DIY vs Buy Guide
Judy Hopps Cosplay Ears: DIY vs Buy Guide
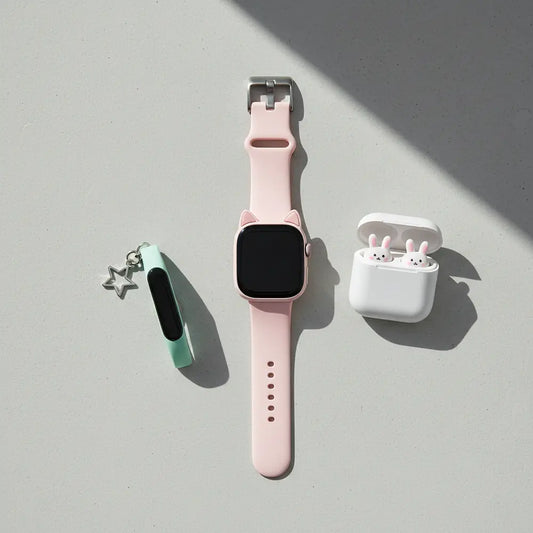
Every Disney Zootopia cosplay needs that one defining accessory to truly bring the character to life. For Judy Hopps, it's her iconic ears. These aren't just any bunny ear props; they’re a statement. But finding the perfect set—authentic, affordable, and beginner-friendly—often feels like a detective case worthy of Zootopia itself. Many cosplayers struggle with finding Judy Hopps cosplay ears that look just right, whether it's figuring out how to make Judy Hopps cosplay ears or where to buy cosplay ears online without breaking the bank.
This guide is your first truly comprehensive resource, bridging the gap between crafting your own DIY bunny ears for cosplay and purchasing ready-made solutions. We'll give you a side-by-side comparison on costs, time investment, tools needed, and the authenticity of results. Get ready to explore both the rewarding path of DIY cosplay and the convenience of buying, ensuring your Judy Hopps costume is camera-ready.
Why Judy Hopps Ears Define Your Cosplay
Core Pain Point Solved: Confusion about why generic bunny ears fail to capture Judy Hopps' essence.
Core Value/Solution Delivered: Clear understanding of the specific design elements that make Judy's ears iconic, improving cosplay authenticity.
Imagine a superhero without their emblem, or a famous detective without their signature hat. That’s how important Judy Hopps cosplay ears are to her character. They are instantly recognizable, conveying her alert, determined, and sometimes playful personality. Without the right ears, a Judy Hopps costume can look like any generic bunny outfit.
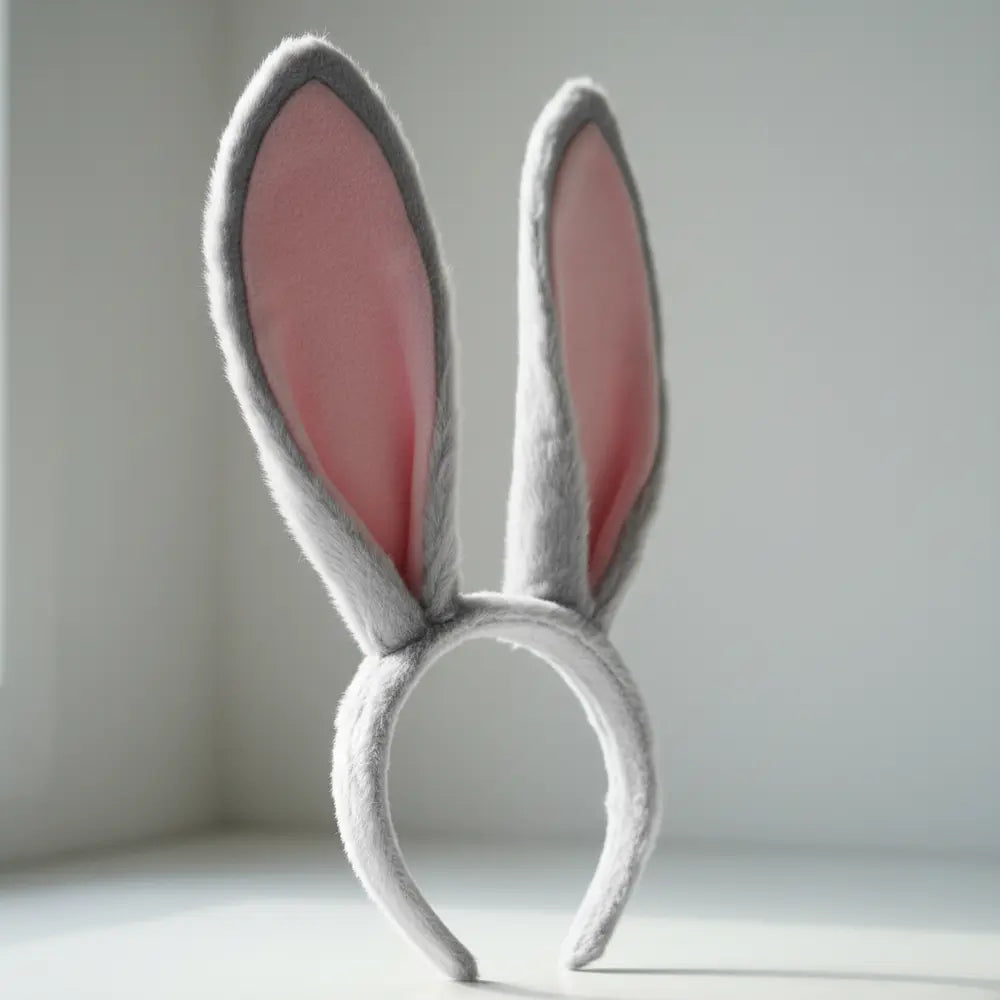
Generic bunny ears often miss crucial details. They might be too floppy, too small, or the wrong shade of gray and pink. Judy’s ears have a distinct shape: they are long, pointed yet slightly rounded at the tips, and always perk upwards with a slight forward curve. The pink inner ear is also a specific, vibrant shade that contrasts with the outer gray. Fans immediately notice when these details are off, which can diminish the impact of your entire Disney Zootopia cosplay. A small difference in ear shape can change the entire character's expression, making your Judy appear more sleepy or aggressive than intended.
Authentic accessories elevate your cosplay from a simple costume to a true character portrayal. When your ears capture Judy's spirit, they instantly communicate her personality, even without speaking. It's often the small, accurate details that receive the most appreciation from fellow fans. Investing in well-made or carefully crafted ears shows your dedication to the character and the source material.
Option 1: DIY Judy Hopps Cosplay Ears
Core Pain Point Solved: Uncertainty about the initial requirements and feasibility of crafting how to make Judy Hopps cosplay ears.
Core Value/Solution Delivered: A clear breakdown of materials, tools, time, and skill needed to empower a DIY decision.
Crafting your own Judy Hopps cosplay ears can be an incredibly rewarding experience, offering unparalleled customization and a sense of accomplishment. It also lets you control the quality and materials, often resulting in more realistic bunny ears for cosplay. The journey starts with understanding what you’ll need and the commitment involved.
Materials Needed for DIY Ears
Creating foam bunny ears for Judy Hopps requires a specific set of materials that are generally easy to find. Expect to spend around $20-$40 on supplies, depending on what you already own. For example, a good quality faux fur can be around $15-20 per yard, but you'll only need a small amount. This allows for precision in achieving the perfect color match.
Here’s a breakdown of essential materials:
- • Faux Fur Fabric: A short-pile gray faux fur for the outer ear, and a pale pink felt or fleece for the inner ear. Getting the right shade of gray is crucial for authenticity.
- • Craft Foam/EVA Foam: 3-5mm thick foam provides the structure for the ears. It's lightweight and easy to shape.
- • Floral Wire/Thick Gauge Wire: For shaping the ears and making them poseable. 16-18 gauge wire usually works well.
- • Headband: A plain, comfortable plastic or metal headband to attach the ears.
- • Contact Cement/Hot Glue: Strong adhesive for securing fabric to foam and attaching wire. Contact cement offers a more professional, long-lasting bond.
- • Batting/Stuffing (Optional): To give the ears a slightly plump, natural look.
Tools Required for Crafting
The tools needed for sewing cosplay accessories are typically found in most craft or hardware stores. You likely already own many of these, keeping initial costs down. Consider a good pair of fabric shears as a key investment for clean fur cuts.
Essential tools include:
- • Sharp Scissors/Craft Knife: For cutting foam and fabric. Dedicated fabric scissors are recommended for clean lines on faux fur.
- • Wire Cutters: To cut and trim the floral wire.
- • Pliers: For bending and shaping the wire.
- • Fabric Markers/Chalk: For tracing patterns onto fabric.
- • Sewing Machine/Hand-Sewing Needles and Thread: For sewing cosplay accessories, specifically attaching the fur to itself.
- • Measuring Tape/Ruler: For accurate sizing and symmetry.
- • Protective Gloves & Mask: Essential when working with contact cement in a well-ventilated area.
Time Investment for DIY
Crafting your own DIY Judy Hopps cosplay ears requires a decent time commitment, especially if you're aiming for a polished, professional look. Most beginners can expect to spend 4-8 hours on their first pair. This estimate includes gathering materials, cutting patterns, shaping the foam and wire, covering with fabric, and final assembly. Planning and patience are key for quality results.
A common misconception is that DIY is always quick. While some elements might be fast, achieving symmetry and a smooth finish takes time. For example, allowing contact cement to properly cure between steps is vital for durability. Rushing the process often leads to noticeable flaws.
Skill Level Needed
The skill level for how to make Judy Hopps cosplay ears is intermediate. While a complete beginner could attempt them, some basic crafting skills are helpful. Experience with using patterns, cutting various materials, and basic sewing (even hand-sewing) will make the process much smoother. An eye for detail and patience are more important than advanced technical skills.
Don't let the "intermediate" label deter you. Many online tutorials break down complex steps into manageable tasks. You'll gain valuable crafting experience, which is a significant bonus for future DIY cosplay projects. The sense of achievement from wearing something you've made yourself is immeasurable.
DIY Tutorial: Step-by-Step Process
Core Pain Point Solved: Overwhelm from complex instructions and fear of making critical crafting errors.
Core Value/Solution Delivered: A clear, manageable cosplay ear headband tutorial with practical tips for avoiding common mistakes.
Crafting DIY Judy Hopps cosplay ears can seem complicated, but breaking it down makes it simple. This checklist-style guide will help you create realistic bunny ears for cosplay with confidence. Getting the basic shapes right is paramount for character accuracy.
Here's a detailed process to follow:
1. Create Your Pattern:
- • Print or draw a Judy Hopps ear shape. Her ears are distinctive: long, tapering slightly to a rounded point, with a wider base.
- • Make two versions: one for the outer gray fur and one slightly smaller (about 1/4 inch smaller all around) for the pink inner ear.
- • Pro-Tip: Print several sizes to find the perfect scale for your head. Judy's ears are notably long relative to her head size.
2. Cutting the Foam Base:
- • Trace the larger ear pattern onto your 3-5mm craft foam.
- • Cut out two identical ear shapes from the foam. These will be the structural core.
- • Mistake to Avoid: Uneven cutting can make ears appear lopsided. Use a sharp craft knife for clean, precise lines, especially on curves.
3. Shaping with Wire:
- • Cut two pieces of floral wire, each about 3-4 inches longer than your foam ear.
- • Bend the wire to match the outer curve of your foam ear, leaving excess wire at the bottom for attachment to the headband.
- • Glue the wire to the *back* of each foam ear using contact cement, ensuring it runs along the outer edge. This allows for future poseability.
- • Best Glue Recommendation: Contact cement offers the strongest, most flexible bond for foam and wire. Apply thinly to both surfaces, let it get tacky, then press together.
4. Covering with Fabric:
- • Place your larger ear pattern onto the *back* of your gray faux fur. Trace it, ensuring the fur's pile runs upwards (from base to tip) for a natural look. Cut out four fur pieces (two for each ear).
- • Trace the smaller ear pattern onto your pink felt/fleece. Cut out two pieces for the inner ears.
- • Carefully glue the gray fur pieces onto each side of your foam ears, trimming excess around the edges.
- • Glue the pink inner ear pieces onto the front of each ear. Ensure smooth application to avoid bumps.
- • Pro-Tip: When cutting faux fur, only cut the backing fabric, not the fur fibers. This prevents a blunt-cut look. Use a craft knife from the back.
5. Attaching Securely to Headband:
- • Position your finished ears onto your headband, ensuring symmetrical placement. Judy's ears are typically set quite far apart.
- • Wrap the excess wire from the ear base firmly around the headband.
- • Secure the ears to the headband with more contact cement or strong hot glue. You might also add small squares of felt or additional fur to cover the attachment points for a cleaner finish.
- • Mistake to Avoid: Attaching ears too loosely. This leads to wobbling or eventual detachment. Ensure a firm, secure connection to the headband.
Your DIY Success Checklist!
Tick off each item to ensure your Judy Hopps cosplay ears are perfectly crafted and ready for show!
Option 2: Buying Judy Hopps Cosplay Ears
Core Pain Point Solved: Difficulty finding reliable sources and understanding the buying process for where to buy cosplay ears online.
Core Value/Solution Delivered: Guidance on reputable stores, expected prices, and key considerations for purchasing ready-made bunny ear props.
Sometimes, time is short, crafting isn't your forte, or you simply prefer a professional finish without the effort. Buying Judy Hopps cosplay ears is a convenient and often high-quality option. The market for affordable cosplay accessories 2025 is robust, offering a range of styles and price points.
Best Online Stores for Cosplay Ears
When you decide to buy, knowing where to look is crucial. Online marketplaces and specialized cosplay retailers are your best bet for finding realistic bunny ears for cosplay.
- • Etsy: A treasure trove for handmade cosplay accessories. Many independent artists create stunning, high-quality Judy Hopps ears. You'll find unique designs and often have direct communication with the creator for custom requests. Search for "Judy Hopps ears" or "Zootopia bunny ears."
- • Amazon/eBay: These platforms offer a wider variety, from mass-produced bunny ear props to smaller sellers. Quality can vary greatly, so always check reviews and seller ratings carefully. Prices here tend to be lower but authenticity might be less consistent.
- • Specialized Cosplay Shops: Retailers like Arda Wigs, Yaya Han's store (though not specific to ears, they sell materials), or other dedicated cosplay prop sites sometimes feature ear accessories. These often cater to higher-end, durable options.
Average Price Ranges
The cost of purchased Judy Hopps cosplay ears can vary significantly based on quality, materials, and whether they are mass-produced or handmade.
- • Basic/Mass-produced: Expect to pay $15-$30. These are typically found on Amazon or eBay, often made from felt or thinner faux fur, and may lack intricate detailing or poseability.
- • Mid-range/Handmade (Etsy): Prices typically fall between $40-$80. These ears feature better quality faux fur, more accurate shapes, and often include wire for poseability. Many are crafted by experienced cosplayers, ensuring better attention to detail.
- • High-end/Custom: For bespoke or highly detailed realistic bunny ears for cosplay, prices can range from $90-$150+. These often use luxury furs, have complex internal structures, and might be fully wired for maximum articulation.
Customization Options
Even when buying, you can often find options for personalization. Many Etsy sellers offer variations, such as different shades of gray fur, adjustable headband styles, or adding small details like airbrushing for realism. Some even allow you to specify the ear length or curvature. Don't hesitate to message sellers to ask about custom requests. This is a great way to ensure the cosplay ear headband tutorial equivalent you're buying matches your vision.
Compared to factory-produced ears, handmade options provide a greater opportunity for bespoke touches, ensuring your Judy Hopps ears are truly unique. Factory ears usually offer little to no customization, meaning you get what's shown in the listing.
Delivery Time
Delivery time is a crucial factor, especially if you have a convention deadline.
- • Mass-produced items (Amazon/eBay): Often have faster shipping options, ranging from a few days to two weeks.
- • Handmade items (Etsy): Typically have a longer processing time as they are made to order. Expect 2-4 weeks, potentially longer for complex custom requests. Always check the seller's estimated shipping times before purchasing.
DIY vs Buy: Side-by-Side Comparison
Core Pain Point Solved: Indecision on the best approach for Judy Hopps cosplay ears due to unclear trade-offs.
Core Value/Solution Delivered: A clear, direct comparison of key factors to help readers make an informed choice between crafting and purchasing.
Deciding between DIY cosplay and buying bunny ear props for your Judy Hopps costume depends on your priorities. Both paths offer unique advantages and disadvantages. This side-by-side comparison focuses on the most critical factors: cost, time, skill, and authenticity.
Here’s a chart summarizing the trade-offs:
| Feature | DIY Judy Hopps Cosplay Ears | Buy Judy Hopps Cosplay Ears |
|---|---|---|
| Cost | Low-Mid ($20-$50): Materials only. Varies by material choice. | Mid-High ($15-$150+): Includes labor, quality, and shipping. |
| Time | High (4-8+ hours): Crafting, troubleshooting, learning. | Low (0-1 hour): Browsing, ordering. Delivery time additional. |
| Skill | Intermediate: Requires basic crafting, patience, precision. | None: Ready-to-wear. Evaluation skills needed for good selection. |
| Authenticity | High Potential: Full control over design, materials, scale. | Variable: Can be very high (custom) or low (generic). |
| Customization | Full Control: Tailor every detail to your preference. | Limited: Dependent on seller's options, less personal. |
| Durability | Variable: Depends on material quality and construction skill. | Variable: Quality depends on seller and price point. |
| Satisfaction | Very High: Pride in creating something yourself. | High: Convenience, professional finish, saves time. |
Cost Breakdown
The financial investment is often a primary concern for affordable cosplay accessories 2025. DIY offers the potential for lower upfront costs. You're paying for raw materials, and potentially reusing tools you already own. However, if you factor in the value of your time, DIY might not always be the cheapest option in the long run. Buying means you're paying for expertise and convenience, which is reflected in the price. A $60 pair of ears on Etsy might save you hours of labor, making it a valuable trade.
Time Investment
Time is a non-renewable resource. Crafting DIY bunny ears for cosplay requires a significant time commitment, especially for a first-timer learning new techniques. This includes sourcing materials, cutting patterns, and meticulously assembling each piece. Buying eliminates this hands-on time entirely. Your only time investment is browsing options and waiting for delivery. If you have a tight deadline for a convention or photoshoot, purchasing pre-made ears is usually the faster route, even with shipping factored in.
Skill Level Required
Creating Judy Hopps cosplay ears yourself demands an intermediate skill level. This means you should be comfortable with basic crafting techniques, using various tools, and problem-solving. It's a fantastic way to develop new skills, but it comes with a learning curve. If you're new to crafting, expect some trial and error. Buying, on the other hand, requires no crafting skill. Your primary skill will be evaluating product photos and reading reviews to ensure you select a high-quality item.
Authenticity and Realistic Bunny Ears for Cosplay
Both DIY and purchased ears can achieve a high level of authenticity. With DIY, you have complete control to perfectly match Judy Hopps' specific ear shape, length, and coloration. This allows for truly realistic bunny ears for cosplay. The challenge is executing that vision flawlessly. When buying, authenticity depends heavily on the seller. Handmade sellers on platforms like Etsy often excel in accuracy, as they cater to specific character cosplays. Generic, mass-produced ears may fall short on detail, resulting in a less accurate look.
If buying, scrutinize product photos and reviews. Look for multiple angles and customer photos to gauge true authenticity.
What's Your Hopps Ears Approach?
We want to know: when it comes to crafting your perfect Judy Hopps cosplay ears, which path will you choose?
Styling and Wearing Tips for Judy Hopps Ears
Core Pain Point Solved: Uncertainty about how to properly wear and integrate bunny ear props for the most accurate and comfortable look.
Core Value/Solution Delivered: Practical advice on ear positioning, wig coordination, and transport to ensure a polished Judy Hopps cosplay headband ideas presentation.
Once you have your Judy Hopps cosplay ears, whether DIY or bought, knowing how to style and wear them is just as important as their construction. Proper placement and care ensure they look their best and stay comfortable throughout your event.
Positioning on Headband
The placement of your cosplay ear headband tutorial creation significantly impacts your overall look. Judy’s ears sit fairly far apart on her head, angled slightly outwards from the base, but pointing generally upwards. Avoid placing them too close together, as this can make them look more like a cat's ears or a generic bunny.
- • Symmetry is Key: Use a mirror to ensure both ears are at the same height and angle. Slight adjustments can make a big difference.
- • Forward Angle: Gently angle the ears forward slightly. This mimics Judy’s active, attentive posture and creates a more dynamic look.
- • Secure Fit: If your ears are poseable, bend the wire at the base so they hug your head comfortably without slipping. For added security, consider using spirit gum or toupee tape to anchor the headband to your wig or skin.
Matching Wig Styles
Your wig is the foundation for your Judy Hopps cosplay ears. A well-styled wig enhances the ears' appearance and ensures a seamless transition. Judy Hopps typically has short, neat, dark gray hair.
- • Wig Cap: Wear a wig cap that matches your skin tone or the wig color to create a smooth base.
- • Volume: Keep the wig's volume relatively low at the crown so the headband sits flat and naturally. Too much volume can make the headband appear to float or sit awkwardly high.
- • Hairline: Ensure the wig's hairline looks natural, especially where the headband might meet it. A slight fluffing of wig fibers can help blend the headband edges.
Transporting for Conventions
`Bunny ear props` can be delicate, especially if they are wired for poseability or made with delicate faux fur. Proper transport is essential to prevent damage, especially when traveling to conventions.
- • Dedicated Box: Use a sturdy cardboard box that is large enough so the ears don't get squashed. You can line it with tissue paper or bubble wrap for extra cushioning.
- • Avoid Pressure: Never pack heavy items on top of your ears. Place them in a separate bag or on top of your luggage.
- • Flat Lay: If possible, transport them flat on a surface rather than standing upright, which can put strain on the headband attachment.
- • Final Check: Before heading out, do a quick inspection for loose glue or bent wires. Small repairs on the spot are easier than a damaged prop at the event.
Common Mistakes to Avoid
Core Pain Point Solved: Fear of making errors during the DIY process or selecting a low-quality purchased product.
Core Value/Solution Delivered: Identification of frequent pitfalls with clear solutions, leading to better Judy Hopps cosplay ears results.
Whether you're crafting or buying Judy Hopps cosplay ears, certain mistakes can compromise the look and durability. Being aware of these common pitfalls helps ensure a successful outcome for your Disney Zootopia cosplay. Even seasoned crafters can overlook small details.
Over-Glued, Messy Finishes
Too much glue is a common beginner error in DIY cosplay. It can seep through fabric, leave shiny residue, or create hard, lumpy spots. It's like adding too much seasoning to a dish—you can't take it back.
- • Solution: When using contact cement, apply thin, even layers to both surfaces, let them get tacky (typically 5-15 minutes), then press firmly. For hot glue, use small dots and press quickly. Always test glue on a scrap piece first. Using protective gloves can also help prevent sticky fingerprints on your pristine ears.
Wrong Fabric Choice
The fabric dictates texture, color, and how realistic bunny ears for cosplay appear. Using the wrong type, like stiff felt for the entire ear or an incorrect shade of gray, immediately detracts from authenticity. Judy's ears are soft, with a subtle fur texture.
- • Solution: Opt for short-pile faux fur in a realistic gray for the outer ear. For the inner ear, a soft, pale pink felt or fleece works best. Check fabric swatches in natural light to ensure the colors are accurate. Consider the way the fur moves and drapes when selecting your material.
Sizing Issues
Proportion is critical for cosplay ear headband tutorial success. Ears that are too small make your head look big, while overly large ears can look comical or heavy. Judy’s ears are long, but they maintain a balanced proportion to her head.
- • Solution: Before cutting final materials, create a paper pattern and hold it up to your head (or a wig on a mannequin) in front of a mirror. Adjust the size until it looks natural and proportionate. Remember that the finished ears will have thickness and fur, which adds a bit to the perceived size. A good starting point for ear length is often the distance from your eyebrow to the top of your head.
Inaccurate Shape
Judy's ears have a very specific, slightly curved shape. Straight, stiff, or overly pointed ears won't capture her essence. This is a subtle but impactful detail for bunny ear props.
- • Solution: Reference screenshots of Judy Hopps from *Zootopia* to nail the exact curvature and tip shape. Use a flexible wire within the foam structure to allow for a gentle, natural curve rather than a rigid, flat ear. Practice bending the wire before attaching to achieve the ideal arc.
Where to Find Inspiration & Tutorials
Core Pain Point Solved: Feeling stuck or uninspired, lacking new ideas or resources for Disney Zootopia cosplay enhancements.
Core Value/Solution Delivered: A curated list of communities and platforms to discover new cosplay headband ideas and refine techniques.
The DIY cosplay community is vibrant and constantly evolving, making it an incredible resource for Judy Hopps cosplay ears inspiration and tutorials. Tapping into these resources can spark new cosplay headband ideas and help you refine your techniques. You don't have to tackle crafting or styling alone.
Disney Cosplay Communities
Online forums and social media groups dedicated to Disney cosplay are fantastic places to connect with fellow fans. These communities often share insights on character-specific details, material recommendations, and troubleshooting tips.
- • Facebook Groups: Search for "Disney Cosplay," "Zootopia Cosplay," or "Cosplay Wigs & Props." These groups are usually active and supportive.
- • Reddit: Subreddits like r/cosplay, r/disneycosplay, and even r/crafts often feature discussions and showcases of fan-made props. Look for specific threads on bunny ear props or sewing cosplay accessories.
- • Cosplay.com Forums: A long-standing community with dedicated sections for character-specific builds and general crafting advice.
TikTok/YouTube Creators
Visual tutorials are invaluable for how to make Judy Hopps cosplay ears. Platforms like TikTok and YouTube are home to countless creators who share step-by-step guides, speed builds, and helpful hacks.
- • Search Terms: Use specific phrases like "Judy Hopps ear tutorial," "realistic bunny ears cosplay," or "cosplay ear wiring."
- • Follow Creators: Find cosplayers who specialize in animal props or Disney characters. Their entire channels can become a goldmine of information. Many will share their insights into foam bunny ears creation.
- • Example: Look for videos that break down complex steps, show close-ups of glue application, or demonstrate how to get the fur direction right.
Pinterest Boards
Pinterest is an excellent visual search engine for cosplay headband ideas and inspiration. You can find mood boards dedicated to Judy Hopps cosplay, ear designs, and different crafting techniques.
- • Create Your Own Board: Pin images of Judy Hopps' ears from various angles, different cosplayer interpretations, and tutorials you find useful. This helps you gather all your ideas in one place.
- • Explore Related Pins: Once you find a good starting point, Pinterest's algorithm will suggest similar content, leading you down a rabbit hole of useful information. You might find ideas for styling your Judy Hopps cosplay ears or even affordable cosplay accessories 2025 inspiration.
Don't be afraid to combine elements from different tutorials. One guide might have the best wiring method, while another excels at fabric application. Blend techniques to create your ultimate DIY cosplay approach.
✨ Community Spotlight ✨
Hear from fellow cosplayers who brought their Judy Hopps to life:
"My DIY Judy ears were a labor of love, and the compliments at the con made every hour worth it! It truly completed the Disney Zootopia cosplay."
"I bought my ears online, and they were perfectly shaped, saving me so much time. The quality was fantastic, and I was ready for my photoshoot instantly!"
Share Your Story with Our Community!While Judy Hopps ears are iconic for their static design, the world of cosplay offers so many creative avenues. If you're curious about *other types of dynamic cosplay accessories*, considering a broader view of animal-inspired styles can spark even more innovative ideas. For example, understanding how movement is engineered in modern props can inform future projects or even your choice of purchased items.
Uncover the Tech Behind Moving Ears: Ever wondered how electric cat ears move with your emotions? Delve into the fascinating adorable tech and science behind dynamic, expressive animal ears often used in modern cosplay and kawaii fashion. Explore the possibilities beyond static props and see how movement truly brings characters to life!Beyond the world of rabbits, the animal-inspired fashion and cosplay scene is booming with exciting trends. Discover how iconic accessories like fox tails are making waves, not just at conventions but in everyday styling. Understanding these broader trends can help you choose or create accessories that stand out.
Trending Beyond Conventions: Discover why cosplay fox tails and anime costume tails are trending beyond conventions—from Gen Z kawaii styling to electric options. Get tips from Meowgic Base on how to incorporate these versatile accessories into your look for both events and daily wear.For those ready to elevate their cosplay with dynamic elements, consider the seamless blend of luxury and technology. Precision-engineered moving ears can capture the essence of a character with unprecedented realism and expressiveness. See how advanced designs can transform your presence.
Elevate Your Cosplay with Expressive Dynamic Ears: Experience the next level of character portrayal with gravity-responsive, rechargeable moving fox ears crafted with luxury faux fur. Elevate your cosplay, TikToks, and everyday fashion with dynamic, expressive enchantment that truly stands out from the crowd.If you're looking for a complete, cohesive transformation, an expertly designed ears and tail set offers unparalleled impact. These sets are crafted for convenience, quality, and striking visual appeal, perfect for making a memorable impression at any event.
Unleash Your Foxy Alter Ego with a Complete Set: Unleash your foxy alter ego with a complete, poseable anime fox ears & tail cosplay set, perfect for conventions, photoshoots, and viral content. Handmade with high-quality materials and designed for comfort, this set from Meowgic Base offers a full, immersive transformation.Conclusion
Choosing between DIY Judy Hopps cosplay ears and buying them is a personal decision, shaped by your unique needs, budget, and time. We've seen that how to make Judy Hopps cosplay ears offers unmatched customization and the deep satisfaction of creation, though it demands time and intermediate skill. Conversely, where to buy cosplay ears online provides convenience and a professional finish, often at a higher cost.
Ultimately, both paths are valid ways to achieve stunning realistic bunny ears for cosplay. Your choice should align with your priorities for cost, time investment, and desired authenticity. Whether you prefer the hands-on challenge of DIY cosplay or the ease of a ready-made solution, the perfect Judy Hopps cosplay ears are within reach.
Explore Our Recommended Shops for Judy Hopps Ears! Download Our Full Judy Hopps Ear Crafting Checklist! For More Disney Cosplay Tutorials, Subscribe to Our Newsletter!FAQ: Your Top Questions About Judy Hopps Ears
What's the best fabric for realistic bunny ears for cosplay?
The best fabric for realistic bunny ears for cosplay is typically a short-pile faux fur in an accurate gray shade for the outer ear. For the inner ear, a soft, pale pink felt or fleece works well, providing a good contrast and texture. Always ensure the fur pile runs upwards for a natural appearance.
How long do DIY Judy Hopps cosplay ears last?
Well-made DIY Judy Hopps cosplay ears can last for several years with proper care. Longevity depends on the quality of materials used, the strength of adhesives, and how securely they are attached to the headband. Storing them in a protective box between uses helps prevent wear and tear.
Are pre-made Judy Hopps cosplay ears customizable?
Customization for pre-made Judy Hopps cosplay ears varies. Mass-produced ears typically offer no customization. However, many independent sellers on platforms like Etsy often provide options for fur color, ear length, or even slight poseability adjustments. Always inquire with the seller about custom requests before purchasing.
Can I use hot glue for cosplay ear headband tutorial projects?
While hot glue can be used for quick fixes or attaching fabric to foam in a cosplay ear headband tutorial, it's not always the strongest or most flexible adhesive. For durable, long-lasting bonds, especially for attaching wire or securing ears to a headband, contact cement is generally recommended. Use hot glue sparingly to avoid bulk.