Magnetic Cosplay Ears Tutorial: Secure Attachment Guide
Ever had your elf ears fall off mid-convention photo? You’re not alone. Here’s the 2025 hack that top cosplayers swear by—magnetic ear attachments that are invisible, strong, and totally dance-proof.
We’ve all been there: the dreaded ear slip. One moment you're posing, feeling epic, and the next, your carefully crafted look is ruined by a rogue clip or a melting glue disaster. The old methods of headbands and obvious clips just don’t cut it anymore for creators who demand a seamless, professional finish.
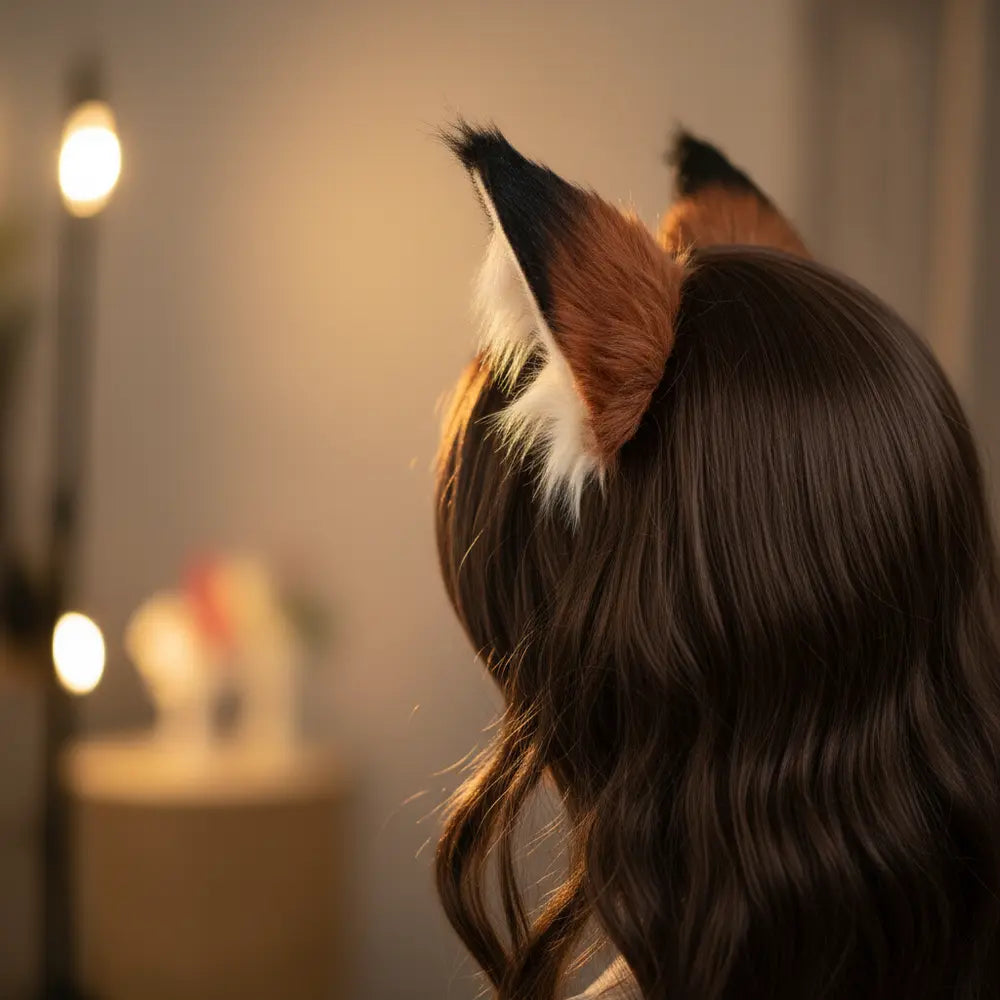
The solution is a game-changer: magnetic cosplay ears. This technique offers a hidden, secure way to attach everything from delicate elf ears to large, furry fox ears directly to your wig.
This is your ultimate guide. We'll go beyond short social media clips to give you the complete picture. You’ll get a full magnetic cosplay ears tutorial, pro-tested tips to fix common problems, and a look at the best products for 2025. Forget the guesswork; it’s time to level up your cosplay game with information you can trust.
Why Magnetic Cosplay Ears Are Trending in 2025
Feeling like bulky headbands are ruining your character’s silhouette? This section explains why the cosplay community is obsessed with the clean, invisible look of magnetic attachments and how you can join the trend.
The shift toward cosplay ears magnets isn't just a fad; it’s a full-blown revolution in how we build our characters. For years, cosplayers accepted that a visible headband or clips were a necessary evil. But in 2025, the standard for excellence has changed, driven by a desire for a flawless, in-character appearance.
One of the biggest drivers is the aesthetic demand for invisible attachments. Modern cosplayers want their elf, cat, or wolf ears to look like they are genuinely part of them. A plastic headband instantly breaks that illusion. Magnets offer a hidden cosplay attachment that sits discreetly under the wig, creating a truly magical effect.
The rise of TikTok and YouTube has also played a huge role. Creators are constantly sharing innovative cosplay convention hacks, and magnetic attachments are a viral favorite. A 30-second video can showcase the incredible stability of magnetic ears, inspiring millions to ditch their old methods. This visibility has created a massive demand for both DIY kits and pre-made magnetic ears on platforms like Etsy.
Finally, the community is moving beyond simply looking good to feeling good. Headbands can cause headaches after a long convention day, and clips can pull on wig fibers. Magnetic systems distribute weight more comfortably, making them a practical choice for all-day wear. It's the perfect blend of form and function.

What's Your Go-To Ear Attachment Method?
How Magnetic Cosplay Ears Work
Ever wonder if magnets are actually safe for your expensive wigs or strong enough to hold? Here, we'll demystify the science behind magnetic attachments and show you why they are a superior choice for securing your cosplay accessories.
The principle behind magnetic cosplay ears is beautifully simple. It involves creating a magnetic "sandwich" with your wig's wefts and cap in the middle. One magnet is secured inside the wig, and its attracting partner is embedded in the base of your cosplay ear. When brought close, they snap together, holding the ear firmly in place.
Safety and Your Wig
A common misconception is that magnets will damage the wig itself. This is largely untrue if done correctly. The key is to use strong neodymium magnets but to create a small, reinforced pocket for the inner magnet, often with felt or sturdy fabric. This prevents the magnet from directly rubbing against or tearing the delicate wig lace or wefts.
Pros and Cons vs. Traditional Methods
Making the switch to magnets is a big decision. Here’s how they stack up against classic attachment styles.
Magnetic Ears:
Headbands:
Clips:
Deciding between magnets, clips, or glue can be tough. For a more detailed analysis of your options, our guide on the best cosplay ear attachment methods provides an expert comparison to help you choose the most secure and comfortable setup for your next convention.
Step-by-Step Magnetic Cosplay Ears Tutorial
Ready to create a flawless, no-headband look but feel intimidated by the process? This detailed, step-by-step tutorial walks you through every part of the installation, ensuring your ears stay put from the first photo to the last panel.
This is where the magic happens. Following this DIY magnetic cosplay ears step by step guide will give you a rock-solid attachment. We'll follow a case study of a cosplayer preparing their Link cosplay for Anime Expo 2025, ensuring their iconic elf ears are perfect.
Tools and Materials You'll Need

Preparing Your Ears and Wig
First, prepare the ears. If they don't have a flat base, you may need to build one up with a small amount of apoxie sculpt or trim them flat. This creates a solid surface for the magnet to adhere to. Glue a magnet to the base of each ear and let it cure completely, usually for 24 hours.
Next, put your wig on the wig head. Place the ears on the wig to find the perfect position. Think about the character. Are the ears high and alert like a fox, or low and subtle like a hobbit? Mark the final placement on the wig with your chalk or pins.
Installing the Inner Magnets
This is the most critical part of the magnetic cosplay ears tutorial.
-
1
Locate the Spot: At your marked spot, gently separate the wig hair to find the underlying weft or cap structure.
-
2
Create the Pocket: Cut a small piece of felt, about twice the size of your magnet. Place the second magnet (the one that attracts your ear magnet) on the wig cap at your marked spot. Double-check its polarity—it must attract, not repel, the ear!
-
3
Secure the Pocket: Drape the felt over the magnet. Using your needle and thread, sew the felt pocket securely to the wig cap or weft. Use tight, small stitches. This pocket prevents the magnet from ever touching your real hair and protects the wig.
-
4
Repeat for the Other Side: Do the exact same thing for the second ear, ensuring the placement is symmetrical.
-
5
Test the Connection: Once the pockets are sewn, bring your cosplay ear close to the spot. You should feel a satisfying *snap* as the magnets connect through the wig. Give it a gentle shake to test the strength.

Our Anime Expo cosplayer found this method held their elf ears so securely that they survived a full day of photoshoots, windy outdoor settings, and even a dance-off. The key was the reinforced felt pocket, which distributed the force and prevented any slippage.
Troubleshooting & Fixes: When Ears Fall Off
That sinking feeling when an ear starts to droop during a convention is the worst. This section is your emergency guide to diagnosing why magnets slip and how to apply quick, con-floor fixes to keep your cosplay intact.
Even with a perfect setup, accidents can happen. A cosplay ears falling off fix is an essential skill for any creator. Understanding why it happens is the first step. Usually, it's due to one of three things: insufficient magnet strength for the ear's weight, incorrect placement causing an imbalance, or a slick wig fiber surface.
The Science of the Slip
Think of magnets like tires on a wet road. If the "tread" (magnetic force) isn't strong enough for the "vehicle" (your ear's weight and leverage), it will hydroplane or, in this case, slide. Heavy, tall ears made of thick latex or resin create more leverage, making them more prone to tipping and slipping than lightweight foam ears.
A common misconception is just to buy the strongest magnet available. Sometimes, an overly powerful magnet can warp a thin wig cap or be too difficult to position. The goal is balance, not just brute force.
Quick Convention Floor Fixes
What do you do when you feel a slip in the middle of a crowded hall? Don't panic.
-
Toupee Tape: Keep a small roll of wig or toupee tape in your repair kit. A tiny square placed on the inner magnet can add just enough friction to stop a minor slip. It's a fantastic hidden cosplay attachment booster.
-
The Hairpin Trick: For a quick mechanical assist, a well-placed bobby pin or hairpin just under the magnetic ear can act as a "shelf," taking some of the downward pressure off the magnet. Hide it under a layer of wig hair.
-
Repositioning: Sometimes, the ear is just off-balance. Take a moment to find a restroom and reposition the ear slightly lower or further back on your head. A small change in the center of gravity can make a huge difference.
Strength Upgrades for Heavy Ears
If you're working with larger items like furry wolf ears or elaborate dragon horns, you may need more power.
-
Double Up: Instead of one thick magnet, try using two thinner ones stacked together on both the ear and inside the wig. This significantly increases the magnetic field and holding power.
-
Increase Surface Area: A wider, thinner magnet often provides better stability than a small, thick one. More surface area means more grip on the wig fibers.
-
The "Pro-Lock" Method: For ultimate security, some creators embed a second, smaller magnet an inch below the main one. This creates an anti-torque system, preventing heavy ears from tipping forward or backward.
For those creating heavier accessories like tails, many of the same principles apply. You can learn more about how Gen Z is incorporating large accessories into daily style in our guide, From Anime Con to Everyday: Why Fox Tails Are Trending.
Final Recommendations & Best Picks
Overwhelmed by all the different magnet kits and DIY options on Amazon and Etsy? We've cut through the noise to give you our top picks for 2025, helping you choose the perfect solution for your skill level and budget.
Choosing the right components is just as important as the technique. While a DIY approach offers customization, several companies now offer fantastic pre-made kits that take the guesswork out of finding the right cosplay ears magnets. Here are our top recommendations.
Top 3 Magnetic Cosplay Ear Kits for 2025
1. The "Con-Ready" Kit (Beginner's Choice):
Description: This kit is perfect for first-timers. It typically includes four pre-coated neodymium magnets, pre-cut felt pockets, and a strong, skin-safe adhesive. The magnets are a balanced strength, ideal for standard latex elf ears or small cat ears.
Pros: Foolproof, comes with everything you need, great instructions.
Cons: Might not be strong enough for very heavy or oversized ears.
2. The "Artisan" Kit (Advanced/DIY Pick):
Description: Sourced from top-rated Etsy sellers, these kits offer more variety. They often include multiple magnet sizes and strengths (like N52 grade), allowing for customization. This is for the cosplayer who wants to secure cosplay accessories of all shapes and sizes.
Pros: Highly customizable, includes stronger magnets for heavier ears, supports small businesses.
Cons: Requires more user knowledge to select the right magnet strength.
3. The "Pro-Series" System (Heavy-Duty Solution):
Description: Aimed at creators working with large-scale ears (e.g., furry werewolf ears, dramatic horns). These kits use larger 1-inch+ magnets and often include buckram for reinforcement instead of felt. They provide maximum holding power.
Pros: The strongest hold available, designed specifically for heavy applications.
Cons: Can be overkill for small ears; requires careful installation to avoid wig damage.
If you're looking to create your own solution from scratch, our article on DIY Hacks to Attach Cosplay Ears Without a Headband is the perfect resource to guide you through sourcing and building your own system. The best part of the magnetic method is its adaptability for all kinds of looks, from cute to epic.
The Future of Your Cosplay
You now have the knowledge to achieve one of the most sought-after effects in modern cosplay: perfectly invisible and secure cosplay ears. By moving away from clunky headbands and unreliable clips, you’re not just attaching an accessory; you’re enhancing your entire character performance with a professional, seamless look.
The power of magnetic attachments lies in their reliability and subtlety. You can move, pose, and even dance with confidence, knowing your ears will stay exactly where you placed them. This is the freedom that allows you to fully embody your character and connect with your audience.
Ready to take your cosplay to the next level? Try the DIY tutorial with a pair of your favorite ears, or invest in one of the recommended kits to get started quickly.
For more next-generation cosplay tutorials and tech innovations, subscribe to our newsletter! You'll be the first to know about new hacks and trends. And if you’re curious about what else is new in animated accessories, find out the science behind animatronics and learn what are moving cat ears and how they work.
Frequently Asked Questions
1. Are magnets strong enough for heavy, furry wolf ears?
Yes, but it requires the right setup. For heavy ears, you'll want to use larger neodymium magnets (at least 3/4-inch to 1-inch diameter) and consider "doubling up" by stacking two magnets. Creating a reinforced buckram pocket inside the wig instead of felt also provides a sturdier anchor point.
2. Can I use magnetic ears with a delicate lace front wig?
Absolutely! This is one of the best ways for attaching cosplay ears to lace front wigs because the attachment is hidden underneath. The key is to be very gentle when sewing the magnet pocket. Sew it to the more durable wefts behind the lace line, not directly to the delicate lace front itself, to prevent tearing.
3. Will cosplay ear magnets damage my expensive wig over time?
If installed correctly, no. The fabric pocket (felt or buckram) is the most important safety feature. It acts as a protective barrier between the magnet and the wig cap, preventing friction and stress. Never glue a magnet directly to the wig cap itself.
4. How do I find the correct magnet polarity so they attract instead of repel?
This is a simple but crucial step. Before gluing or sewing anything, hold one magnet in your hand and bring the other one close. If they snap together, you've found the attracting sides. If they push away, flip one magnet over. Use a sharpie to mark the attracting faces so you don't get them mixed up during installation.