How Animatronic Ears & Tails Work for Cosplay
How Animatronic Ears & Tails Work for Cosplay
You finally unbox the animatronic ears and tail set you’ve been waiting for. The faux fur is perfect, but then you see the contents: a tangle of wires, a remote, mysterious plastic brackets, and a manual that looks like it was translated five times. That initial excitement quickly turns to a quiet dread.
This feeling is common. Many cosplayers invest in an amazing cosplay ears and tail combo only to feel intimidated by the technology inside. There’s a fear of breaking something expensive, confusion about the setup, and frustration when the movement isn’t as smooth or lifelike as promised.
This guide changes that. We will demystify exactly how do animatronic ears and tails work, breaking down the core components into simple concepts. You'll get step-by-step insights, maintenance hacks for longevity, and even advanced tutorials for DIY modifications that add stunning realism to your character.
The Rise of Animatronic Cosplay Accessories
The Question: Ever wonder why so many high-level cosplays now seem to twitch, wag, and react to the world around them?
The Promise: This section explains the cultural and technological shifts that transformed interactive cosplay from a niche hobby into the new gold standard for character immersion.
The move from static props to interactive builds marks a significant evolution in cosplay. Characters from anime, video games, and the furry community are defined by their expressive features. Animatronics allow cosplayers to embody that personality, not just wear a costume. A simple ear twitch or tail wag can convey emotion more powerfully than a fixed prop ever could.
This trend was fueled by influences like the expressive wolf goddess Holo from Spice and Wolf and the vibrant characters popular in the furry fandom. As technology became more accessible, creators saw an opportunity. They began integrating small motors and controllers into their builds, pioneering what would become a staple at modern conventions.
The result? A clear shift in expectations. At a 2025 convention, a top-selling accessory isn't just a static piece; it's a fully integrated animatronic ears and tail set that responds to the wearer. The demand is no longer just for accuracy—it’s for life. This trend isn't limited to just any animal; the cultural significance of the fox, in particular, has driven a massive surge in popularity. To understand how this specific look went from niche to mainstream, explore our deep dive in “From Anime Con to Everyday: Why Fox Tails Are Trending.”
How Do Animatronic Ears and Tails Work?
The Question: Do the wires, motors, and circuit boards in your new kit look like an impossible, high-tech puzzle?
The Promise: We'll break down the core components into simple, understandable parts. This section explains exactly how the magic happens, turning complex electronics into easy-to-grasp concepts.
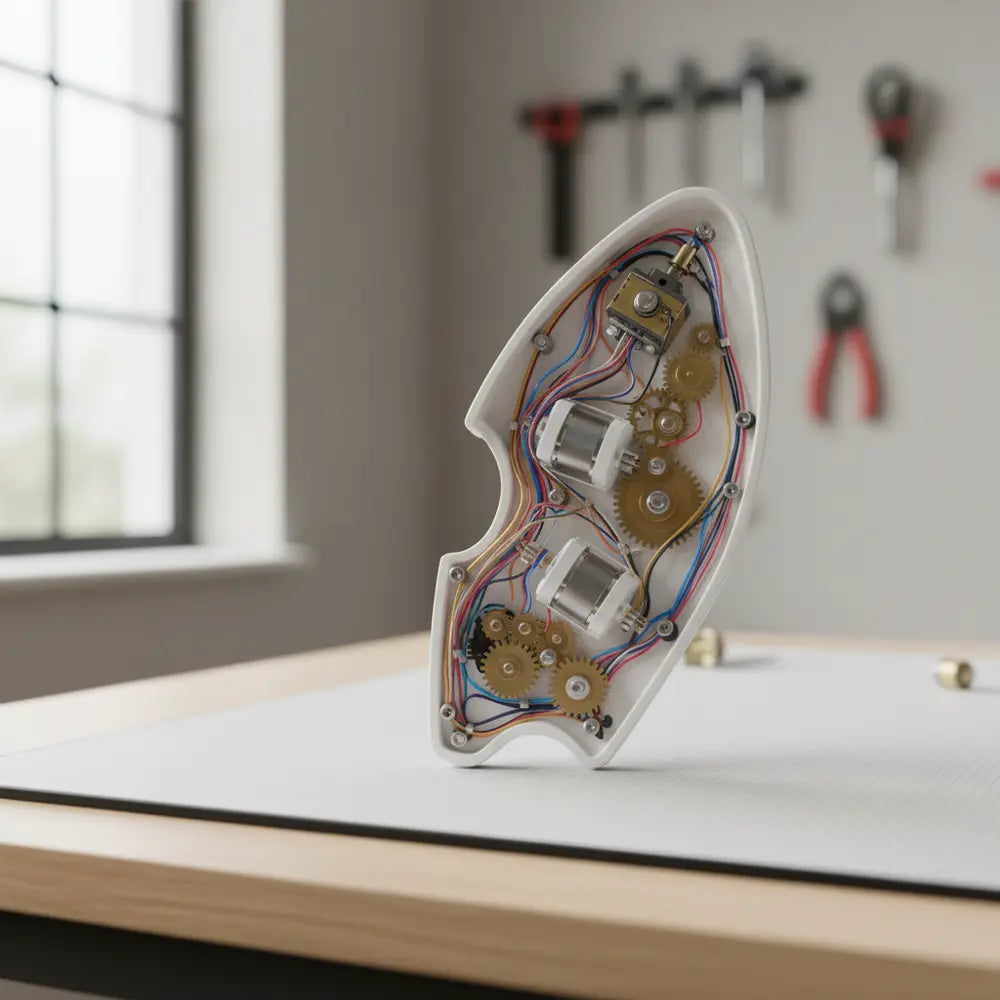
At its heart, an animatronic accessory is a simple robotic system. Think of it less as a complex machine and more as a team of components working together. Each part has a specific job, and understanding them is the first step to mastering your gear. Let’s demystify the core pieces of a typical cosplay animal ears and tail with movement.
The Core Components: Muscles, Brains, and Senses
- 1. Servo Motors (The Muscles): These are the small, powerful motors responsible for all movement. A servo isn't just a spinning motor; it can be precisely controlled to move to a specific angle and hold it. Think of it like the muscle in your arm—it can flex, hold, and relax on command. In a tail, one or two servos create a side-to-side wag. In ears, smaller servos produce a twitch or a fold.
- 2. Microcontroller (The Brain): This is a miniature computer, often an Arduino board or a similar custom-programmed chip. It acts as the central command unit, taking input from the remote control and sending instructions to the servo motors. It tells the "muscles" when, how fast, and how far to move.
- 3. Sensors (The Senses): While not in all kits, advanced animatronics use sensors for reactive movement. An accelerometer, for example, can detect when you jump or turn quickly, triggering a corresponding tail movement. These sensors provide the data that makes the movements feel organic and responsive.
Power and Control: Keeping It Alive
A common point of failure for many kits is the power source. Most animatronic ears and tail sets use a rechargeable lithium-ion (Li-ion) or lithium-polymer (LiPo) battery pack. Pay close attention to its capacity, measured in milliamp-hours (mAh). A higher mAh rating means a longer run time before you need to recharge.
Wireless control is typically handled by a radio frequency (RF) remote. Budget kits might use a simple one-button remote for a single movement, while premium options offer multi-channel remotes to trigger different sequences. This wireless function allows you to activate your cosplay’s movements without breaking character.
For instance, a budget kit may use a single, clunky servo that results in a jerky, unnatural wag. In contrast, a premium kit might use two high-torque, silent servos orchestrated by a sophisticated microcontroller, producing a fluid, S-shaped motion. This is the difference between a prop that simply moves and one that feels alive.
DIY Moving Ears and Tail Cosplay Kit Breakdown
The Question: Are you ready to build your own DIY moving ears and tail cosplay kit but worried about making a costly mistake or frying the electronics?
The Promise: This section is your go-to assembly guide, complete with essential tool lists and troubleshooting advice to ensure a successful, stress-free build from start to finish.
Building your own animatronic gear is incredibly rewarding. It gives you full control over the final look, feel, and movement. While it seems technical, the process is straightforward if you follow a logical sequence and prepare for common hurdles.
Essential Tools and Materials
Before you begin, gather your toolkit. Having the right tools prevents frustration and damage to delicate components.
- Soldering Iron & Solder: For creating strong, permanent electrical connections.
- Wire Strippers & Cutters: Essential for preparing wires.
- Hot Glue Gun: Perfect for securing components and insulating connections.
- Screwdriver Set: For assembling the mechanical frame.
- Multimeter (Optional but Recommended): Helps test connections and troubleshoot electrical issues.
Would you build or buy your animatronic set?
Step-by-Step Assembly Foundations
While every kit is different, the general assembly process follows a similar path.
- Build the Skeleton: Start by assembling the physical structure of the tail or ears. This is often a series of 3D-printed vertebrae or a wire frame. Ensure all joints move freely before adding electronics.
- Mount the Servos: Securely attach the servo motors at the base (for a tail) or within the ear forms. A loose servo is a primary cause of poor movement and excess noise.
- Wire the Electronics: Connect the servos, battery pack, and receiver to the microcontroller. Pay close attention to polarity (+ and -). A common mistake is reversing these, which can permanently damage your board.
- Test the System: Before adding the fur cover, power on the system. Use the remote to test the full range of motion. This is the time to fix any jerky movements or wiring issues.
- Add the Skin: Carefully slide the faux fur covering over the mechanical skeleton, ensuring it doesn’t snag on wires or impede joint movement.
Common Mistakes and Pro-Tips
- Mistake: Not securing wires. Loose wires can get caught in moving parts, causing shorts or mechanical jams. Use zip ties or hot glue to route them neatly.
- Pro-Tip (Servo Speed Hack): Does your ear twitch look too robotic and fast? In many DIY kits using Arduino, you can easily modify the code. Change the `servo.write()` command to a loop that incrementally moves the servo a few degrees at a time with a small `delay()`. This smooths out the motion for a much more realistic effect.
While these foundational steps provide a great overview, a successful build lies in the details. For creators who want a definitive guide, our DIY Animatronic Cosplay Tail Tutorial (Step-by-Step Guide) is the best resource available, providing complete wiring schematics and maker hacks. For headwear, the go-to guide is our comprehensive DIY Moving Cat Ears Tutorial for Cosplay, which bridges the gap between raw electronics and elegant, character-accurate design.
Choosing the Best Moving Ears and Tail Bundle
The Question: Overwhelmed by the hundreds of online options and unsure which best moving ears and tail bundle for cosplay is actually worth your money?
The Promise: This section delivers a clear buyer’s guide, helping you compare features and spot quality so you can confidently invest in the right gear for your needs and budget.
When you're ready to buy a pre-built set, the market can feel like a minefield. Prices for a cosplay ears and tail combo range from under $50 to over $500. Understanding what separates an affordable novelty from a premium, convention-ready accessory is key to making a smart purchase.
Affordable vs. Premium: What's the Difference?
An affordable animatronic ears and tail combo (typically under $100) is great for casual use or as a base for modifications. However, they often use louder, less reliable servos, have limited movement patterns (e.g., only one wag speed), and may have shorter battery life. The fur and construction can also be lower quality.
A premium set, on the other hand, justifies its price with superior components. These often feature:
- Silent, high-torque servos for smooth, quiet, and powerful movements.
- Multiple movement modes programmed into the microcontroller (e.g., slow wag, excited twitch, tremble).
- Longer-range wireless remotes and higher-capacity batteries.
- Durable, lightweight construction and high-quality, realistic faux fur.
Key Features to Compare
When shopping, create a checklist to compare your options.
- Movement Quality: Does the tail have a fluid, S-curve motion, or is it a stiff, side-to-side wag? Look for video demonstrations.
- Battery Life: Check the mAh rating and the estimated run time. Anything less than 4-5 hours is impractical for a convention.
- Remote Control: Is it a simple on/off switch or a multi-function remote that allows for different expressions?
- Build Quality: Look at the base and attachment method. A flimsy clip won't hold up, while a sturdy, comfortable harness or belt plate will.
Where to Buy and What to Avoid
Reputable sellers on platforms like Etsy, as well as specialized cosplay tech stores, are your best bet. A major red flag is a product listing with no videos of the item in action. Also, be wary of sellers with no reviews or those using generic stock photos.
As a case study, the fictional "Fenrir-Tech Mk. IV" bundle, a top-rated set from 2025, was praised not for its speed but for its programmable "emotion engine." It used an accelerometer to make the tail droop when the wearer looked down and wag when they moved quickly, showcasing how advanced programming separates the best from the rest.
Maintenance & Longevity Hacks
The Question: Worried that your expensive realistic moving ears and tail for costumes will get ruined or break down after just one or two conventions?
The Promise: Learn these essential maintenance secrets to protect your electronics, care for the materials, and keep your animatronic gear running smoothly for years to come.
Animatronic cosplay gear is an investment. Like any sophisticated piece of tech, it requires a little care to ensure it survives the chaos of a convention floor and lasts for many events to come. Ignoring maintenance is the fastest way to turn a dynamic accessory into a dead weight.
Cleaning Faux Fur and Electronics
A common misconception is that you can't clean the fur cover. While you should never submerge the entire piece in water, you can spot-clean the fur with a damp cloth and a mild detergent. For the electronic housing, use a can of compressed air to blow out dust and debris that can jam mechanisms.
Preventing and Repairing Wear and Tear
The most vulnerable part of any animatronic is its wiring. Wires can fray or break from repeated movement.
- Hack: Insulate Your Wires. Before your first use, inspect all visible wires. If they look exposed, especially near joints, reinforce them with electrical tape or, for a cleaner look, heat-shrink tubing. This simple step can prevent 90% of field failures.
- Replacing Parts: If a servo burns out, don't panic. Most are standard models (like the SG90 or MG996R) that can be bought online for a few dollars. Carefully desolder the three wires from the old servo and solder the new one in its place, matching the colors.
Battery Care and Storage
Proper battery care is crucial for longevity. Never store your battery fully charged or fully depleted for long periods. The ideal storage charge is around 50%. After a convention, charge it to half-full before putting it away. Storing a LiPo battery at full charge can reduce its lifespan by up to 40% in a single year.
Think of your animatronic's battery like your smartphone's battery. You wouldn't leave it in a hot car or store it dead for months. Treat it with the same care, and it will be ready for your next event.
Advanced Mods for Realism
The Question: Is your current animatronic gear feeling a bit... predictable? Are you ready to go beyond the default settings and add true personality to your character?
The Promise: This section is your workshop for advanced modifications. We'll show you how to program custom movements, add sound, and sync your gear for a performance that will stop people in their tracks.
Once you've mastered the basics, you can elevate your furry animatronic cosplay gear from a cool accessory to a true extension of your character. These advanced modifications require some comfort with DIY electronics but deliver unparalleled results. The goal is to move beyond pre-programmed wags and create behaviors that feel truly alive.

Programming Custom Movement Sequences
If your kit uses an Arduino or a similar programmable board, you have a powerful tool at your disposal. Instead of a simple `A-to-B` wag, you can program complex sequences. For example, you could code a "curiosity" sequence for a cat tail: a slow, low wag followed by a sharp flick at the tip.
- Example: Wolf Pack Sync. For a group cosplay, you could program a wolf's ears to sync with its tail movement. A sequence might involve the ears perking up (`servoEar.write(10)`) followed immediately by a low, cautious tail wag (`servoTail.write(80)`), creating a cohesive expression of alertness.
Adding Sound Effects
Integrating sound adds another layer of immersion. A small audio FX board and a micro speaker can be wired to the same microcontroller. You can program it to play a happy chuff or an angry hiss that is triggered by the same remote button that controls a specific movement. This syncs the physical and auditory expressions of your character.
Wireless and Sensor-Based Hacks
Why stop at a remote? An accelerometer is a cheap, tiny sensor that detects motion and orientation. By adding one to your build, you can program reactive movements. Imagine a tail that wags faster as you walk, or ears that droop when you bow your head. This makes the animatronic feel less like something you control and more like something that responds to you.
For the ultimate mod, you can replace the default RF receiver with a Bluetooth module. This allows you to control the animatronics from a custom app on your phone, giving you infinite control over speed, sequences, and timing without fumbling for a separate remote.
Cosplay Convention Field-Test Insights
The Question: Your animatronic build looks amazing at home, but will it actually survive an 8-hour day on a crowded convention floor?
The Promise: We’re sharing real-world insights from the con floor. Learn the truth about all-day comfort, battery management, and how to keep your tech reliable in the busiest environments.
There's a huge difference between a five-minute test in your living room and a full day of wear at a bustling convention. Here’s what you can expect when you take your high quality cosplay ears and tails combo into the wild, based on feedback from seasoned cosplayers.
Comfort Is King
After about three hours, you'll notice every flaw in your setup's ergonomics. A heavy tail attached by only a belt clip will start to sag and pull on your costume. The best systems use a wide, sturdy base plate or a full harness that distributes the weight across your lower back. For headbands, extra padding is non-negotiable.
"My first moving tail was amazing for photos, but after walking the floor for half a day, my back was aching. For my next build, I created a custom thermoplastic plate that fit my back perfectly. It made a world of difference."
— Pixel_Kitsune, Seasoned Cosplayer
Crowd Reactions and Posing
Animatronics are engagement magnets. People will stop you constantly for photos and videos. A pro-tip is to have a few "poses" ready that showcase the movement. For example, turn away from the camera and trigger a tail wag, or use an ear twitch to react to a friend's comment. It brings your photos to life.
Tech Reliability in a Hostile Environment
A convention floor is a battlefield for electronics. Thousands of cell phones, vendor Wi-Fi signals, and other cosplayers' remotes create a lot of RF interference. Your wireless remote might become less responsive. Test its range and carry a spare battery for both the remote and the main pack. A "con emergency kit" with a small screwdriver, zip ties, and electrical tape can be a lifesaver.
Which Moving Accessory Suits Your Character?
Answer a few quick questions to find your perfect animatronic match!
Future of Animatronic Cosplay Accessories
The Question: What's the next frontier for moving cosplay parts? Are we heading toward truly intelligent, responsive accessories that think for themselves?
The Promise: Look into the future with us as we explore the cutting-edge trends in AI, materials, and design that will shape the next generation of robotic cosplay accessories.
The world of animatronic cosplay is advancing at a breakneck pace. The DIY hacks of today are becoming the standard features of tomorrow. Here are the most exciting trends on the horizon that will push the boundaries of immersive character performance.
AI and Emotion-Reactive Integration
The next major leap is AI integration. Imagine ears that can analyze the tone of your voice and react accordingly—perking up when you sound excited or drooping when you speak softly. Experimental prototypes are already using tiny machine-learning models to recognize keywords or emotional cues, triggering pre-programmed responses.
One university project showcased an AI-driven tail that could "listen" for a character's name. When the name was spoken, the tail would perform a unique, excited wagging sequence. This moves beyond user-controlled input into a realm of true environmental interaction.
Lighter Materials and 3D Printing
Weight is a constant battle for cosplayers. The future lies in lighter, stronger materials. We're seeing a shift from heavy plastic skeletons to flexible TPU (thermoplastic polyurethane) and even carbon fiber frames. These materials reduce the strain on the wearer and allow for more complex and delicate movements without sacrificing durability.
Beyond Cosplay: New Applications
The technology perfected in moving cosplay headbands and tails has potential far beyond conventions. Designers are exploring interactive fashion that responds to the wearer's mood. There are also potential therapeutic applications, such as calming accessories for sensory processing disorders or social aids that provide non-verbal feedback.
The skills you learn building a DIY moving ears and tail cosplay kit today are the foundation for engaging with these future technologies. Every wire you solder and every line of code you write is a step toward what's next.
Your Cosplay, Brought to Life
Animatronic ears and tails are more than just accessories; they are sophisticated pieces of technology that bridge the gap between costume and character. They offer a level of immersion that was once the exclusive domain of theme parks and movie studios. By understanding how they work, you take back control.
You no longer have to fear the tangle of wires or a confusing manual. Whether you're choosing the best moving ears and tail bundle or building your own from scratch, you now have the knowledge to make informed decisions, perform critical maintenance, and even push the limits with your own custom modifications.
Ready to start your own build or learn more about the tech behind the magic? Explore our library of in-depth guides, starting with the essentials of ear mechanics and their fascinating evolution in "From Cute to Clever: What Are Moving Cat Ears?". For more cosplay tech breakdowns and exclusive tutorials, join our mailing list and bring your next character to life.
Frequently Asked Questions (FAQ)
1. How long does it take to build a DIY animatronic tail?
For a first-time builder following a tutorial, expect to spend around 10-15 hours. This includes 3D printing or building the frame, wiring the electronics, coding the microcontroller, and fitting the fur cover. Experienced makers can often complete a build in a weekend.
2. Are animatronic ears heavy or uncomfortable to wear all day?
They can be if not designed well. A good set of animatronic ears should weigh no more than 200-300 grams. Look for models built on a wide, comfortable headband with padding. The key to all-day wear is a balanced design that doesn't create pressure points.
3. What's a good starter animatronic ears and tail set for a beginner?
For beginners, a good starter set is one that is pre-programmed with a few simple movements and has a self-contained battery pack. This lets you focus on the cosmetic side of cosplay. Look for bundles under $150 from sellers with strong reviews and clear video demonstrations of the product in action.
4. Can I make my animatronic cosplay accessories waterproof?
No, you cannot make them fully waterproof due to the exposed moving parts and fabric covers. However, you can make them water-resistant. Use silicone sealant or hot glue to protect electrical connections and circuit boards inside their housing. This will protect them from light rain but not from being submerged.