
DIY Animatronic Cosplay Tail Tutorial (Step-by-Step Guide)
Imagine walking onto the convention floor. The energy is electric, a sea of incredible costumes. But then, something sets you apart. As you pause to talk to a friend, your meticulously crafted realistic cosplay tail with motors gives an independent, lifelike swish. Heads turn. People point, their faces filled with wonder. "How did you do that?" they ask.
This is the power of adding motion to your cosplay. Yet, most guides on how to make a moving cosplay tail are frustratingly vague. They show a cool result but skip the critical details, leaving you with more questions than answers about the wiring, code, and mechanics.
This guide is different. We're opening up the maker's toolkit to give you a true step-by-step blueprint. You'll get a full materials list, wiring instructions, starter code, and the pro-level troubleshooting tips you need. By the end of this tutorial, you will have the knowledge to build your own impressive animatronic cosplay tail.
Why Build an Animatronic Cosplay Tail?
Ever wonder what separates a good cosplay from a truly unforgettable one? It’s often a single, magical detail that brings the character to life. This section explains why adding motion is that game-changing element and how it can make your creation the star of the show.
Most cosplay tails are static. They look great in photos, but they lack the dynamic energy of the character you're embodying. An animatronic tail, powered by simple robotics, transforms a passive accessory into an active part of your performance. It’s the difference between a costume and a character that breathes.
Movement adds a profound layer of realism and personality. A slow, gentle sway can convey calmness, while a quick, perky flick can show excitement. This level of expression forges a deeper connection with your audience. Data from major conventions shows a growing trend towards interactive and tech-integrated cosplay, with over 30% of award-winning designs featuring electronic elements.
Think of it like this: a static tail is a photograph, but an animatronic tail is a movie. It tells a story with every swish. This is what makes wearable cosplay tech so powerful. It’s not just about adding lights or sounds; it’s about creating motion that feels organic and alive, ensuring your project stands out in a sea of amazing creations.
For instance, the technology that powers a moving tail is a fantastic entry point into the world of cosplay tech gadgets for conventions. The same principles can be applied to other projects, like the expressive accessories discussed in our article that explores the tech behind another popular cosplay accessory. If you've ever been curious about those, you should read “From Cute to Clever: What Are Moving Cat Ears?” to learn more. Understanding this core tech opens up a world of possibilities for future builds.
Materials and Tools You'll Need
Does looking at a long list of electronic parts feel overwhelming? You're not alone. We’ve broken it all down into a clear, organized shopping list with realistic costs, so you can gather what you need with confidence and without breaking the bank.
Building your own DIY cosplay tail is more accessible than you might think. Many of these components are staples in the maker community and can be found on sites like Adafruit, SparkFun, or Amazon. A common misconception is that you need the most expensive parts for a good result; for a first build, reliable budget-friendly options work perfectly.
Here is a bill of materials that provides a solid foundation. Prices are estimates and can vary based on the supplier and components you choose.

| Component | Purpose | Estimated Cost (USD) |
|---|---|---|
| Arduino Uno / Nano | The "brain" of your tail. | $15 - $25 |
| Standard Servo (e.g., SG90 or MG996R) | The "muscle" that creates movement. | $5 - $15 |
| 5V Power Bank (5000mAh+) | Portable power source. | $15 - $20 |
| Breadboard & Jumper Wires | For prototyping without soldering. | $5 - $10 |
| EVA Foam or Fosshape | For creating the lightweight inner spine. | $10 - $20 |
| Faux Fur Fabric | The outer skin of your tail. | $20 - $30 |
| Heavy-Duty Webbing & Buckles | To build a secure waist harness. | $10 - $15 |
| Basic Toolkit | Hot glue gun, craft knife, wire strippers. | ~$25 |
| Total Estimated Cost | $105 - $170 |
A Pro-Tip on Servos
For your first build, an SG90 micro servo is cheap and easy to program. However, for a larger or heavier tail, upgrading to a metal-gear servo like the MG996R is a smart move. It offers more torque and durability, preventing gear stripping under load.
Understanding How Moving Tails Work
Have you ever looked at a moving prop and thought it was pure magic? Let's pull back the curtain. This section demystifies the core mechanics, explaining in simple terms how the electronics work together to create lifelike motion.
At its heart, an animatronic cosplay tail is a simple system. You can think of it as a team where each part has a specific job. The Arduino is the brain, the servo is the muscle, and the power bank is the heart. They all work together to bring your creation to life.
Servo Motors and Control Boards
The key to movement is the servo motor. Unlike a regular motor that just spins continuously, a servo can be told to move to a specific angle and hold that position. We control this using the Arduino, a tiny, programmable computer known as a microcontroller. The Arduino sends a specific type of signal (called a PWM signal) to the servo, telling it where to go.
Power and Battery Management
Your animatronic tail needs a reliable power source. A simple USB power bank is the perfect solution. It’s portable, rechargeable, and provides the stable 5 volts that both the Arduino and the servo need to operate correctly. A common mistake for beginners is trying to power the servo directly from the Arduino's pins, which can cause instability and damage the board.
Movement Programming Basics
You don't need to be a coding expert for this project. Arduino cosplay projects often start with pre-written examples that you can modify. The standard "Sweep" sketch included with the Arduino software is the perfect starting point. It contains all the commands needed to make a servo move back and forth in a smooth, sweeping motion—ideal for a tail wag!
This setup forms the foundation for many cosplay robotics tutorials for beginners. Once you master this basic configuration, you can apply it to all sorts of motorized costume accessories.
Step-by-Step Build Guide
Ready to turn that pile of parts into a functional work of art? This is where the magic happens. We’ll guide you through each stage of the build, from the internal skeleton to the final furry cover, with clear instructions and actionable tips.
This is the core of your project. Take your time, test your components at each stage, and don't be afraid to experiment. The goal is to build something you're proud of.
Interactive Build Checklist
Building the Skeleton and Spine
How do you create a structure that's both strong enough to house the electronics and flexible enough to move naturally? This section shows you how to build the core mechanism that forms the backbone of your tail.
The skeleton is what gives your tail its shape and allows for segmented movement. We'll use lightweight EVA foam for this.
- Design the Segments: Cut several donut-shaped segments from your EVA foam. A diameter of 3-4 inches with a 1.5-inch hole in the center is a good starting point. Taper the diameter of the segments so they get smaller toward the tip of the tail.
- Create the Spine: Run a flexible-but-firm material, like a strip of durable plastic or thick leather, through the center of the foam segments. This will act as the "spine," preventing the tail from being too floppy.
- Mount the Servo: The first, largest segment (at the base of the tail) will house your servo motor. Cut a precise slot in the foam and secure the servo with hot glue. Make sure the rotating arm of the servo is unobstructed.
- Connect the Spine: Attach the end of your spine material directly to the servo arm. Now, when the servo arm rotates, it will pull the spine, causing the entire tail to bend and swish.
A common mistake is making the segments too far apart, which results in unnatural, jerky movements. Aim for about half an inch of spacing between each foam donut for a smoother curve.

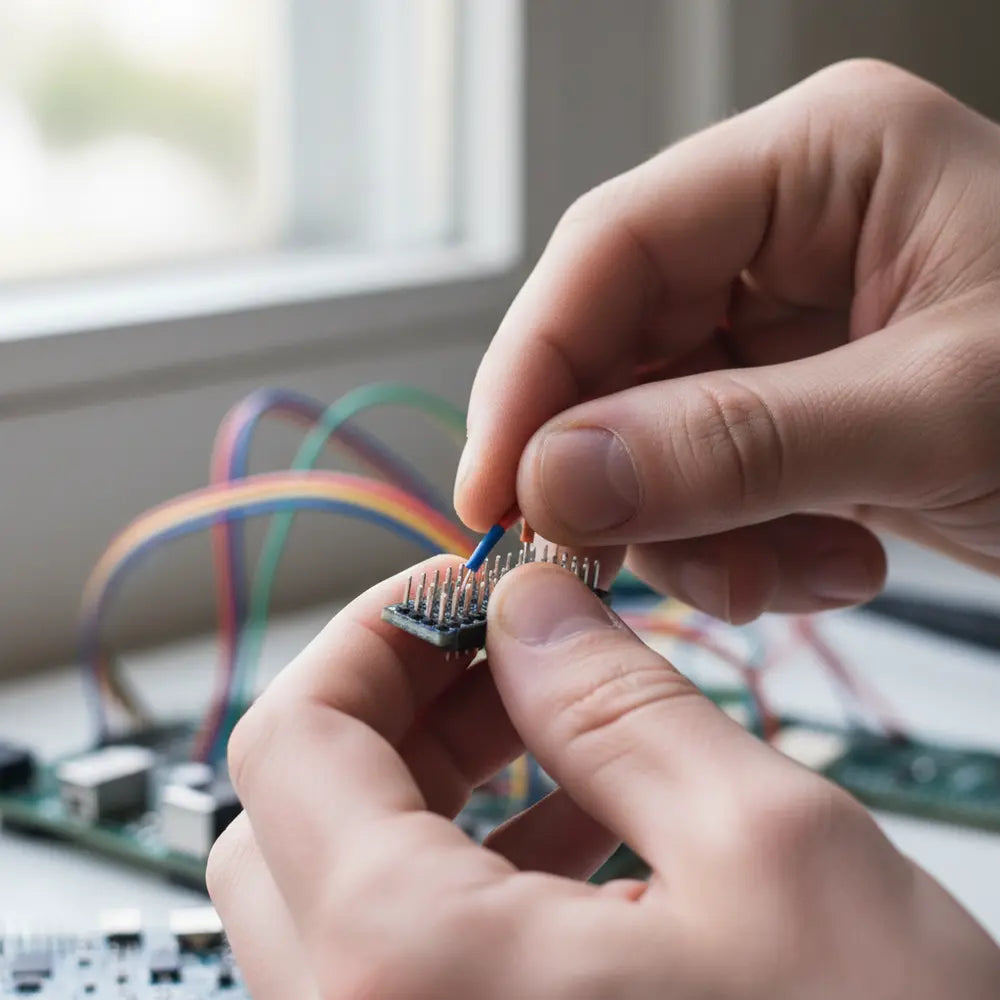
Wiring the Electronics
Does looking at a bundle of wires make you nervous? It shouldn't. This part simplifies the process with a clear, safe wiring plan. We'll show you exactly what goes where, ensuring your project powers up correctly on the first try.
This step is simpler than it looks. We are only connecting three main components: the Arduino, the servo, and the power source.
Follow this connection guide:
-
Servo to Arduino: The servo has three wires.
- Brown/Black Wire (Ground): Connect this to a `GND` pin on the Arduino.
- Red Wire (Power): Do not connect this to the Arduino's 5V pin. We'll connect it directly to the power source.
- Orange/Yellow Wire (Signal): Connect this to a digital PWM pin on the Arduino (e.g., pin `9`).
-
Power Connections:
- Cut a USB cable and expose the red (positive) and black (negative) wires.
- Connect the USB's black wire to the servo's brown/black wire and the Arduino's `GND` pin.
- Connect the USB's red wire to the servo's red wire and the Arduino's `VIN` pin.
This setup ensures the servo draws power directly from the power bank, preventing the Arduino from being overloaded. For an even more comprehensive breakdown and printable diagrams, our complete guide offers updated techniques using modern tools. Explore the DIY Electric Moving Tail: Step-by-Step Cosplay Guide for the ultimate resource.
 Download our free PDF wiring diagram
Programming the Arduino
Think coding is only for software engineers? Think again. This section provides a simple, copy-paste-ready code snippet to get your tail moving instantly, along with a clear explanation of how it works.
Now we give the brain its instructions. Arduino uses a simplified programming language based on C++. Don't worry, we'll start with a basic script that makes the tail "sweep" back and forth.
Open the Arduino IDE software and paste the following code:
#include <Servo.h>

Servo tailServo;  // create servo object to control a servo
int pos = 90;     // variable to store the servo position

void setup() {
  tailServo.attach(9);  // attaches the servo on pin 9 to the servo object
}

void loop() {
  // Sweep from left to right
  for (pos = 60; pos <= 120; pos += 1) { // goes from 60 degrees to 120 degrees
    tailServo.write(pos);              // tell servo to go to position in variable 'pos'
    delay(15);                         // waits 15ms for the servo to reach the position
  }
  // Sweep from right to left
  for (pos = 120; pos >= 60; pos -= 1) { // goes from 120 degrees to 60 degrees
    tailServo.write(pos);              // tell servo to go to position in variable 'pos'
    delay(15);                         // waits 15ms for the servo to reach the position
  }
}
What This Code Does:
- `#include <Servo.h>`: Loads the built-in Arduino library for controlling servos.
- `tailServo.attach(9);`: Tells the Arduino that our servo's signal wire is connected to pin 9.
- `loop()`: This section runs over and over. The code inside moves the servo from a 60-degree angle to a 120-degree angle and back again, creating a wagging motion.
- `delay(15);`: This small pause makes the movement smoother. You can change this value to make the wag faster or slower.
Upload this code to your Arduino, and your tail's skeleton should spring to life!
Crafting the Tail Cover and Harness
How do you hide the technology and make the tail comfortable to wear all day? We'll cover the final steps: creating a beautiful, seamless cover and a robust harness that distributes the weight perfectly.
Now for the final aesthetic touches.
- Create a Pattern: Lay your faux fur fabric fur-side down. Place your tail skeleton on top and trace an outline, leaving about an inch of seam allowance. Cut out two identical pieces.
- Sew the Cover: Sew the two pieces together, leaving the base open. Turn the resulting "sock" right-side out. The fur should now be on the outside. Carefully slide it over the tail skeleton.
- Build the Harness: The harness is crucial for comfort. Use heavy-duty nylon webbing and a sturdy buckle to create a belt. Attach a small, rigid plate (wood or plastic) to the back of the belt. This is where you will mount the base of your tail. This distributes the weight across your hips instead of pulling on one spot.
- Attach the Tail: Securely mount the base of the tail (the segment with the servo) to the plate on your harness. Tuck the Arduino and power bank into a small pouch on the belt.
For a masterclass in finish quality, look at professionally made options. For example, studying the craftsmanship of a product like the Dynamic Red Fox Moving Tail for Cosplay & Fashion demonstrates how a seamless integration of fur and mechanics creates a truly believable product.
Troubleshooting Common Issues
Did your animatronic tail suddenly stop working or start acting weird? Don't panic. This section is your go-to emergency guide, providing clear fixes for the most frequent problems that makers encounter during and after the build.
Even the best makers run into problems. Over 80% of beginner electronics issues stem from bad connections or not enough power. Before you get frustrated, check these common failure points. A multimeter is your best friend for diagnosing these problems quickly and safely.
- Problem: The servo is jittering or not moving at all.
Solution: This is almost always a power issue. Ensure your power bank is fully charged. Check that the servo's red (power) and brown (ground) wires have a solid connection to the power source and are not trying to draw power from the Arduino's 5V pin. - Problem: The tail's movement is weak or jerky.
Solution: Your servo might not have enough torque for the tail's weight. Consider upgrading to a stronger, metal-gear servo (like an MG996R). Alternatively, try to lighten the tail's construction by using less dense foam or a smaller design. - Problem: The battery drains incredibly fast.
Solution: A servo is constantly drawing small amounts of power to hold its position. A 5000mAh battery should last a few hours, but constant, fast movement will drain it quicker. For a full day at a convention, consider carrying a second power bank. - Problem: The tail attachment slips or feels unstable.
Solution: Your harness needs reinforcement. Ensure the base plate is rigid and securely fastened to the belt. Using two parallel belts, one on the waist and one on the hips, can provide much greater stability for heavier realistic cosplay tails with motors.
Showcasing and Upgrading Your Tail
Your animatronic tail is built and working perfectly—so, what's next? This section gives you tips for making a splash at your next convention and explores exciting upgrades to take your creation to the next level of interactivity.
Your moving tail is a fantastic achievement and a major crowd-pleaser. When you're at a convention, don't just let it run. Use the movement to interact with people. A well-timed swish when someone compliments your cosplay can create a memorable, magical moment.

Ready to level up your build? The great thing about Arduino cosplay projects is that they are endlessly expandable. Here are a few ideas:
Add a Remote Control
By adding a simple Bluetooth module (like an HC-05) to your Arduino, you can control the tail's movements from your smartphone. This allows you to program specific wags, twitches, and gestures that you can trigger on command. This is one of the most popular upgrades for cosplay tails with remote control.
Program Complex Patterns
Go beyond the simple "Sweep" code. You can write functions for different "moods": a fast, twitchy "excited" pattern, a slow, lazy "relaxed" sway, or even a "startled" flick. This adds another layer of performance to your character.
Exploring different character styles can also be a source of inspiration. The enduring popularity of certain aesthetics, as highlighted in our definitive guide on why fox tails are trending from conventions to daily fashion, shows how a well-executed accessory can define a look. This project is your gateway to becoming a specialist in moving props for conventions.
POLL: Which character would you build this tail for?
Your Maker Journey Has Begun
You now have the complete blueprint for building one of the most engaging cosplay tech gadgets around. You've learned how to choose materials, wire the electronics, write the basic code, and troubleshoot the most common problems. You've taken a complex concept and broken it down into a manageable, rewarding project.
The next step is to start building. Gather your components, fire up your hot glue gun, and bring your character to life. The skills you've developed here—in electronics, programming, and fabrication—are the foundation for countless future motorized costume accessories.
Ready for your next challenge? Subscribe to our newsletter for more cosplay robotics tutorials for beginners. And when you're ready to source parts or explore more advanced techniques, check out our comprehensive **DIY Electric Moving Tail Guide** for a different take on the build process. We can't wait to see what you create—share your build with us on social media!
Frequently Asked Questions (FAQ)
1. How much does a DIY animatronic tail cost to build?
The total cost typically ranges from $105 to $170. The biggest variables are the quality of the servo motor you choose and the price of the faux fur. You can save money by sourcing parts from multiple vendors or by using components you already own from other maker projects.
2. Can I make my animatronic cosplay tail waterproof?
While you can't make it fully submersible, you can make it water-resistant. Use silicone sealant or hot glue to protect all electronic connections and the servo casing itself. Additionally, you can enclose the Arduino and battery pack in a small waterproof project box or a sealed plastic bag.
3. What's the best Arduino for cosplay projects?
For this project, an Arduino Uno or Nano is perfect because they are user-friendly and have excellent community support. For smaller, more compact wearables, many makers transition to a Trinket Pro or a Beetle, as their tiny footprint is easier to hide within a costume.
4. How long does the battery last on a moving cosplay tail?
With a standard 5000mAh power bank, you can expect 3-5 hours of continuous movement. The exact time depends on the tail's weight, the servo's power draw, and the speed of the movement. For a full convention day, it's highly recommended to carry a spare, fully charged power bank.