Best Servo Motors & Arduino Kits for DIY Moving Cat Ears (2025 Guide)
Why Animatronic Cat Ears Are the Ultimate Cosplay Upgrade
The psychology of a great cosplay is rooted in immersion. When a character comes to life, it captures the imagination. Static props are representations, but dynamic props are experiences. Animatronic cat ears that twitch, pivot, and react transform you from someone wearing a costume into the character themselves. It’s a powerful, non-verbal way to communicate emotion and personality.
Cat ears are a staple in anime, gaming, and pop culture, symbolizing everything from playful mischief to feline alertness. Characters like Blake Belladonna from RWBY or various virtual YouTubers have made them iconic. This widespread recognition means that adding realistic movement to them creates an instant connection with a huge audience of fans.

A common misconception is that animatronics are too complex for anyone but engineers. While advanced projects can be intricate, a simple, reliable moving ear setup is surprisingly accessible. The key is choosing the right components from the start, which prevents the headaches of troubleshooting a flimsy build later on.
The trend of robotic cosplay accessories goes beyond just ears. For instance, the growing popularity of animatronic tails shows a clear demand for more dynamic and interactive cosplay elements. To see how this trend is evolving, explore our deep dive into the community movement:
Discover Why Fox Tails Are Trending Beyond ConventionsCore Components Needed for Moving Cat Ears
Creating your own Arduino cat ears project requires just a few key components. Understanding what each one does will demystify the process and give you the confidence to assemble them. Think of it as a simple recipe with three main ingredients.
1. Servo Motors
These are the small but mighty motors that create the ear movement. They don't just spin continuously; you can tell them to move to a precise angle and hold it. For cat ears, you'll primarily look at micro servos due to their small size and light weight.
- Torque: This measures the motor's turning force. Even for lightweight foam or 3D printed moving cat ear mechanism designs, you need enough torque to move the ear smoothly without stuttering.
- Gear Type: Servos come with plastic or metal gears. Plastic is cheaper but can strip under stress. Metal gears offer far greater durability, a must-have for a prop you'll wear all day.
2. Arduino Microcontroller
This is the "brain" of your operation. You'll upload a simple program (called a "sketch") to this small board, which then tells the servo motors when and how to move. It's the central piece of any Arduino servo project.
For wearable projects, smaller boards like the Arduino Nano or Pro Mini are ideal. They are compact, consume less power, and can be easily hidden within the headband or costume.
3. Headband, Power, and Materials
This is the foundation of your headgear. You need a sturdy headband that can comfortably support the ears, servos, and a small battery pack. It's also critical for hiding the wires.
A pro-tip is to choose a wider headband (at least 1 inch). This provides more surface area for mounting your components securely and makes concealing the servo wiring tutorial connections much easier. For power, a small 5V USB power bank or a LiPo battery pack are excellent choices for a battery powered animatronic cat ears setup.
Best Servo Motors for Animatronic Cat Ears (2025 Picks)
Choosing the right servo is the single most important decision for your project's longevity. A weak or unreliable servo will lead to jittery movement, stripped gears, and eventual failure. We've tested the most common options to give you a clear recommendation for your DIY cosplay animatronics kit.
Here’s a breakdown of our top 2025 picks.

1. Tower Pro SG90 (The Budget Starter)
The SG90 is often the first micro servo beginners encounter. It's incredibly cheap and widely available, making it tempting for a first project. However, its limitations become apparent quickly.
- Pros: Extremely affordable, very lightweight.
- Cons: Plastic gears strip easily, prone to jittering, not durable for long-term use.
- Performance: In our tests, the SG90 began showing gear wear and inconsistent movement after just 4-5 hours of continuous use at a convention.
- Best For: Prototyping and testing your mechanism on a tight budget, but not for a final build you need to rely on.
2. Tower Pro MG90S (The All-Rounder Champion)
The MG90S is the metal-geared sibling of the SG90, and the upgrade is significant. For only a few dollars more, you get a massive boost in durability and reliability, making it our top recommendation for most cosplayers.
- Pros: Durable metal gears, great torque for its size, smooth and reliable movement.
- Cons: Slightly heavier and more expensive than the SG90.
- Performance: Our MG90S test unit ran for over 12 hours straight without any signs of jitter or gear stripping. It's the workhorse you need for a full day at a con.
- Best For: Any cosplayer who wants a reliable, long-lasting build without breaking the bank. This is the sweet spot for value and performance.
3. DS3218MG (The High-Performance Powerhouse)
If your project involves larger, heavier ears or you simply want the best possible performance, a standard-sized digital servo like the DS3218 is the answer. It's overkill for most cat ear projects but offers unmatched strength.
- Pros: Extremely high torque, all-metal construction, incredibly precise digital control.
- Cons: Much larger, heavier, and consumes more power. Requires a very sturdy headband.
- Performance: This servo can handle virtually any load you throw at it. The movement is flawless and powerful.
- Best For: Large-scale animatronic projects (e.g., large horns, wings) or cosplayers who demand absolute peak performance and have a build that can support it.
For a deeper dive into component selection, especially if you're considering 3D printing your parts, the go-to resource is our up-to-date buyer’s guide. It provides tailored reviews of the latest printers and kits specifically for animatronic cosplay.
View the Best 3D Printers & Servo Kits (2025 Guide)Step-by-Step Guide: Building DIY Animatronic Cat Ears
Building your own set of moving cat ears is a rewarding project that combines crafting with a touch of technology. Don't be put off by the electronics; the process is straightforward when taken one step at a time. We'll guide you through assembly, wiring, and basic programming.
Your Complete Parts Checklist
Before you start, gather all your materials. Having everything on hand makes the building process smooth and enjoyable. Use our interactive checklist below to keep track of what you have.
Assembly and Wiring the Mechanism
This is where your project starts to take physical form. The goal is to securely mount the servos and connect them to the Arduino brain. Think of the wiring like connecting building blocks—each pin has a specific purpose.

- Mount the Servos: Attach your two servo motors to the headband or your 3D printed base. Position them where you want the ears to sit. Use hot glue or small screws for a secure fit. Make sure they can rotate freely without hitting anything.
-
Connect Servos to Arduino: Servo wires are almost always color-coded:
- Brown/Black Wire: Ground (GND)
- Red Wire: Power (5V)
- Orange/Yellow Wire: Signal (Data)
Connect the Signal wire from your left ear servo to digital pin D9 on the Arduino Nano. Connect the Signal wire from the right ear servo to pin D10.
-
Connect the Gyroscope: The MPU-6050 sensor tells the Arduino how your head is tilted. Connect it as follows:
- VCC -> 5V on Arduino
- GND -> GND on Arduino
- SCL -> A5 on Arduino
- SDA -> A4 on Arduino
- Connect Power: Do not power the servos directly from the Arduino's 5V pin. This can overload the board. Instead, connect the Red (Power) wires from BOTH servos directly to the 5V output of your power bank. Connect the Brown (Ground) wires from BOTH servos to the power bank's ground.
- Create a Common Ground: This is a crucial step that many beginners miss. Run one more wire from the power bank's ground to any GND pin on your Arduino. This ensures all components share the same electrical reference point, preventing erratic behavior.
Programming Your Arduino for Movement
The Arduino sketch is the set of instructions that reads data from the gyroscope and translates it into servo movements. You don't need to write it from scratch; the community has already created excellent code that you can adapt.
First, you'll need to install the `Servo.h` and `Adafruit_MPU6050` libraries in the Arduino IDE. The basic logic of the code is:
- Read the tilt angle from the MPU-6050 sensor.
- Map that angle to a corresponding servo angle (e.g., 0-180 degrees).
- Write that angle to the servos, causing them to move.
Here is a simplified example of what the core `loop()` function looks like:
#include <Servo.h>
#include <Adafruit_MPU6050.h>
#include <Adafruit_Sensor.h>
#include <Wire.h>

Servo leftEarServo;
Servo rightEarServo;
Adafruit_MPU6050 mpu;

void setup() {
  leftEarServo.attach(9);
  rightEarServo.attach(10);
  mpu.begin();
  // Additional setup for MPU sensor
}

void loop() {
  sensors_event_t a, g, temp;
  mpu.getEvent(&a, &g, &temp);

  // Read the y-axis acceleration (tilt)
  float tilt = a.acceleration.y;

  // Map the tilt value to a servo angle (e.g., 45 to 135 degrees)
  int servoAngle = map(tilt, -10, 10, 45, 135);

  // Constrain the angle to prevent servo damage
  servoAngle = constrain(servoAngle, 45, 135);

  // Write the same angle to both ears for symmetrical movement
  leftEarServo.write(servoAngle);
  rightEarServo.write(servoAngle);

  delay(15); // A small delay for smooth operation
}
This code creates a basic tilt-controlled movement. You can find more advanced code online that adds twitches and more complex reactions.
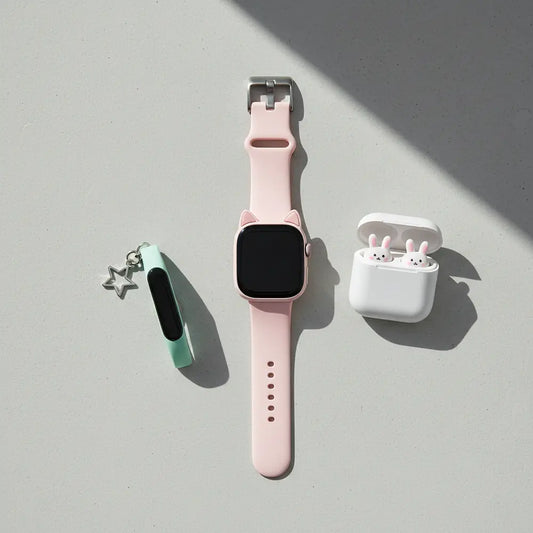
Crafting the Ears and Final Touches
With the electronics working, it's time for the fun part: making them look like actual ears. The key here is to keep the ear shells lightweight to minimize strain on your servos.
- Foam Construction: Use craft foam (EVA foam) to build a lightweight ear shape around your mechanical linkage. It's easy to cut, shape with heat, and glue.
- 3D Printing: If you have a 3D printer, you can find many pre-designed ear shells and mechanisms online. A pro-tip is to print with a lower infill (around 15-20%) to save weight.
Once your ear shape is complete, create a "sock" out of your chosen faux fur. Slide it over the ear form and glue it down securely. For a truly polished look, use an electric razor to trim the fur in certain areas, adding depth and realism.
For styling inspiration and more detailed crafting methods, the ultimate resource is our guide on decoration, headband attachment, and design inspiration for anime, gaming, and original characters.
Explore the DIY Moving Cat Ears Cosplay GuideBuying Guide: DIY Kits vs Pre-Made Options
Now that you understand the components, the final decision is how to acquire them. Your choice between a full DIY approach, a curated kit, or a pre-made product depends on how much you value customization, convenience, and cost.
Option 1: The Full DIY Approach
This involves sourcing every component individually. It offers the most control and is often the most affordable path if you source parts carefully.
- Pros: Lowest potential cost (around $30-$50). Total control over component quality (e.g., choosing MG90S servos). Excellent learning experience.
- Cons: Requires more research and time to find and order all parts. Higher chance of getting a faulty or incorrect component from a random seller.
Option 2: The DIY Kit
A DIY cosplay animatronics kit bundles all the necessary electronics together. It strikes a great balance between the learning experience of a DIY build and the convenience of a one-click purchase.
- Pros: Convenience: All tested, compatible parts are in one box. Saves time on sourcing individual components. Often includes detailed, project-specific instructions.
- Cons: Slightly more expensive than sourcing parts yourself (around $40-$70). Less flexibility if you want to substitute a specific component.
Option 3: Pre-Made Animatronic Ears
For those who want the final effect without the build process, pre-made ears are the perfect solution. The quality and price can vary dramatically, so it's important to buy from a reputable maker.
- Pros: No assembly or programming required; ready to wear out of the box. Professionally finished and typically very durable.
- Cons: Highest cost (often $120+). No customization options. You miss out on the rewarding experience of building it yourself.
A budget DIY kit at around $40 might use cheaper SG90 servos and require you to 3D print your own parts. A premium $120+ pre-made set will likely use high-quality servos, a professionally assembled mechanism, and high-end materials, offering a plug-and-play experience. Knowing the technology and science behind the magic helps you judge the value of these options. If you're curious about the fundamentals, our article explaining the tech is a great place to start.
Ever wondered how these accessories come to life? Discover the adorable tech and science behind moving animal ears.
Learn: What Are Moving Cat Ears?Your Character, Brought to Life
You now have a complete roadmap. You know that the MG90S servo motor offers the best balance of power and durability for your build. You understand that an Arduino Nano is the compact brain for your project, and you have a clear, step-by-step process to follow.
Most importantly, you are now protected from the biggest pain point for any maker: spending money on unreliable parts that fail when you need them most. You can build with the confidence that your animatronic creation will perform flawlessly from the moment you enter the convention to the very end of the day.
Ready to start your build? All the tested servos, Arduino boards, and curated kits mentioned in this guide are available to get you started on the right foot.
-> [Shop Our Top Recommended Kits and Parts Now] <-We can't wait to see what you create! Share your finished builds and progress pictures on Instagram and TikTok with the hashtag #DIYCatEars2025 to connect with a community of fellow creators.
Frequently Asked Questions (FAQ)
1. How do I power my animatronic cat ears for a full day at a convention?
The best solution is a small, lipstick-sized 5V USB power bank. A 5,000mAh capacity is lightweight and will easily power your Arduino and two micro servos for over 8-10 hours of continuous movement. It can be discreetly tucked into a pocket or a pouch on your belt.
2. What's the real difference between a plastic gear (SG90) and a metal gear (MG90S) servo?
Think of it like the gears on a bicycle. Plastic gears are like a toy bike's—they work for light use but will strip and fail under repeated stress. Metal gears are like a mountain bike's—they are built to handle constant force and direction changes, making them far more durable for a cosplay you'll wear and move in all day.
3. Is it difficult to learn the Arduino code for moving cat ears?
Not at all. The beauty of the Arduino community is that most of the code you need already exists. You'll be using pre-written "libraries" that simplify commands. Instead of complex coding, you'll mostly be copying, pasting, and tweaking a few values, like the maximum tilt angle for your ears.
4. Can I make the cat ears react to sound or something else instead of head movement?
Absolutely! That's the power of using an Arduino. You can swap the MPU-6050 gyroscope for a small microphone sensor. With a few changes to the code, you could program the ears to twitch in response to loud noises or even sync them to music.
5. How much does a full DIY animatronic cat ear project cost?
If you source the parts yourself and opt for budget-friendly (but reliable) components like the MG90S servos, you can build a complete set for approximately $30-$50, not including the cost of materials for the ear shells like foam or 3D printer filament. A curated kit may cost slightly more, around $40-$70, but saves you the time of sourcing individual parts.