DIY Cosplay Ears Repair: Quick Fix Guide
It’s the night before the convention, and disaster strikes. Your beautiful, expressive cosplay ears suddenly stop moving. The twitch is gone. The connection is dead. A wave of panic sets in. All that time, money, and passion are suddenly at risk because of one tiny malfunction.
Don’t give up. Your convention is not ruined. This is not a generic troubleshooting manual filled with complex instructions. This is a real-world survival guide for last-minute cosplay ears repair. We’re giving you fast, budget-friendly fixes you can pull off in your hotel room, even if you only have tape, glue, and a phone charger.
You are resourceful, and your cosplay is worth saving. These next sections are your emergency toolkit. We will walk you through structured solutions, from simple resets to clever disguises, to ensure you can still walk onto that convention floor with total confidence. The amazing technology that powers these accessories is surprisingly accessible. To truly understand the mechanics you're about to fix, it's worth exploring the core concepts behind them. For an excellent overview, you can check out our article that asks, "From Cute to Clever: What Are Moving Cat Ears?", which delves into the tech that brings these cosplay pieces to life.
Common Problems with Cosplay Animatronic Ears
Ever have that sinking feeling when your tech fails at the worst possible moment? Let’s identify the three most common culprits behind ear malfunctions so you can quickly pinpoint the problem and get to the solution.
The most frequent issues with animatronic ears almost always fall into three categories. Understanding them is the first step in any quick DIY animatronic ears repair. These are the breakdowns that send cosplayers scrambling right before a big event.
One cosplayer shared a story of their Cosears going silent the night before Anime Expo. After a full day of travel, they discovered the ears wouldn't respond. This scenario is incredibly common, with some cosplay surveys suggesting nearly 30% of tech-heavy cosplays experience a failure during a convention weekend.
Here are the top offenders:
- Movement Failure: One or both ears stop twitching, get stuck, or make a grinding noise. This often points to a servo motor or wiring problem. The dreaded "one ear up, one ear down" look is a classic sign of this issue.
- Connectivity Chaos: Your ears won't connect to your phone's Bluetooth, or the dedicated app keeps freezing. This is a frustrating software glitch that can often be fixed without any tools. This is a major source of Cosears Bluetooth connection issues.
- Power Problems: The ears won’t turn on, won't hold a charge, or the charging light behaves strangely. This is a frequent cosplay animatronic ears charging issue and can stem from the battery, the port, or your charging cable.
Quick Electrical Fixes You Can Do Without Tools
Is the problem electrical, but you left your soldering iron at home? Don’t worry. This section reveals three powerful fixes you can perform with items you likely have in your bag right now.
When your ears suddenly die, the issue is often a simple electrical interruption, not a catastrophic failure. Before you assume the worst, try these three tool-free hacks. They address the most common electrical hiccups and can get your ears moving again in minutes.
Check the Charging Port
A surprising number of charging issues aren't with the ears themselves but with a faulty cable or a dirty port. Use the flashlight on your phone to look inside the charging port on the ears. If you see any dust or debris, gently blow it out or use a dry toothpick to carefully clear it.
Then, test the port with a cable you know works, like your phone charger. If the charging light comes on with a different cable, you’ve found your culprit. This simple swap has saved countless cosplayers from a last-minute panic.
Perform a Hard Reset
Think of this as the ultimate refresh button. Many animatronic ears, including popular models like Cosears, have a tiny, hidden reset button near the charging port. You’ll need a paperclip, a SIM card tool, or even an earring post to press it.
Turn the ears on, then gently press and hold the reset button for about 10 seconds until you see an indicator light flash or the ears twitch. This forces the internal electronics to reboot, clearing any software glitches that might be causing the movement or connection failure.
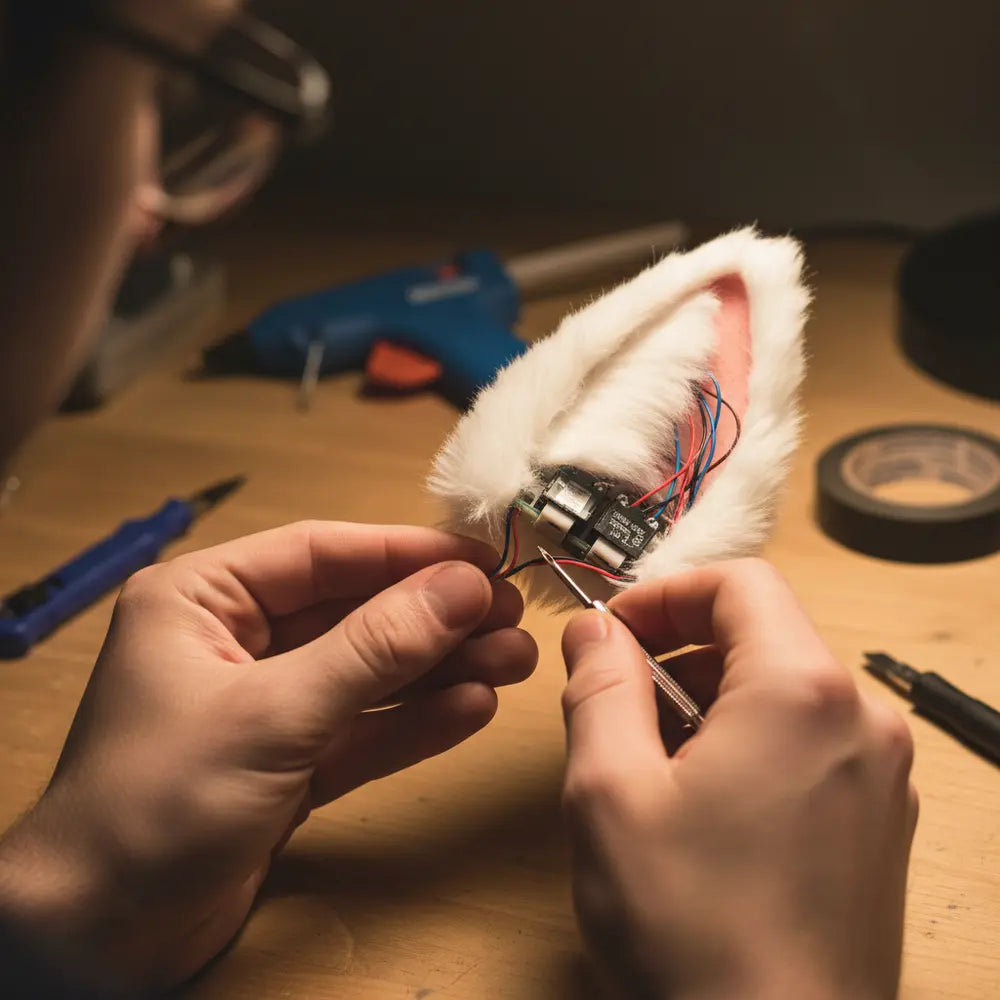
Use Tape for a Temporary Wiring Bypass
Feel like you're in a spy movie, trying to hotwire your own gear? You're not far off. Let's look at how a simple piece of tape can solve a critical wiring problem.
If you notice an ear twitching intermittently when you move the headband, you likely have a loose wire. For a quick cosplay animatronic ears wiring problems fix, you don’t need a soldering kit. All you need is a small piece of clear tape.
Carefully inspect the area where the wires enter the ear mechanism. If you see a frayed or loose connection, your goal is to secure it. Gently press the exposed wire back into place and apply a small, tight strip of clear tape over it. This can create enough pressure to re-establish the connection and get you through the day.
Bluetooth and App Emergencies
Is your app frozen or your Bluetooth refusing to connect? It's a modern-day nightmare. This part of the guide is your digital lifeline, showing you how to force your tech to cooperate.
When your animatronic ears are physically fine but digitally disconnected, the frustration is immense. A software bug can be just as debilitating as a broken wire. These steps will help you tackle Cosears Bluetooth connection issues and other app-related meltdowns without needing to be a tech wizard.
The "Forget and Rediscover" Trick
This is the number one solution for Bluetooth problems. Your phone sometimes holds onto old or corrupt connection data. Go into your phone’s Bluetooth settings, find your cosplay ears in the list of paired devices, and tap "Unpair" or "Forget This Device."
Next, turn your ears off and then on again to put them back into pairing mode. Now, go back to your phone’s Bluetooth menu and scan for new devices. When your ears appear, reconnect them as if they were a brand new accessory. This fresh handshake often solves the problem.
Reset the App Itself
If the app is the source of the trouble, simply closing and reopening it might not be enough. You need to clear its cache.
- On Android: Go to Settings > Apps. Find the ear control app, tap on it, then go to "Storage" and select "Clear Cache." Do not hit "Clear Data" unless you are ready to set it up from scratch.
- On iPhone: The process is less direct. The best option is to offload the app. Go to Settings > General > iPhone Storage. Find the app and select "Offload App." This removes the app but keeps its data. Then, reinstall it from the App Store.
Handle a Failed Firmware Update
A firmware update that gets interrupted can "brick" your ears, leaving them unresponsive. If this happens, do not panic. The first step is to perform a hard reset using the paperclip method mentioned earlier. This can sometimes force the device to revert to its previous stable firmware.
If that fails, check the manufacturer’s website or a fan forum on Reddit. Often, there is a manual recovery process that involves connecting the ears to a computer. This is a last resort, but it’s a crucial option to know about for fixing a failed update.
Mechanical and Servo Motor Fixes on a Budget
Hear a grinding sound or see an ear that’s completely stuck? That’s likely a servo motor issue. Let's get our hands dirty with some clever mechanical fixes that don't require an engineering degree or expensive parts.
The tiny servo motors are the muscles of your animatronic ears. When one of them jams or breaks, the magic of movement is lost. But a servo motor malfunction doesn't mean you need to buy a new set. Here’s how you can approach fixing the servo motor in animatronic ears with what you have on hand.
Identifying a Jammed Servo
First, you need to diagnose the problem. Turn the ears on and listen closely. If you hear a faint buzzing or a grinding noise coming from the stuck ear when it's supposed to move, the motor is receiving power but is mechanically blocked. This is often better news than a dead motor.
Sometimes, a piece of fur, a stray thread, or a bit of hot glue has simply gotten into the gear mechanism. Try gently wiggling the ear back and forth by hand. You might be able to dislodge the obstruction without opening anything up. Be gentle; you don’t want to strip the gears.

Salvaging a Replacement Servo
If the motor is truly dead (no sound at all), a replacement is necessary. But you don't need to order one online and wait. Think about other electronics you or a friend might have. An old RC car, a broken drone, or any small robotic toy often contains the exact same type of micro servo motor.
If you have a mini screwdriver, you can often open the ear housing and the toy and swap the motors. It’s a surprisingly simple process for a DIY animatronic ears repair. Pay close attention to the wire colors (usually red for power, black for ground, and white/yellow for signal) and connect them in the same order.
The Temporary Mechanical Bypass
What if you can't fix the servo right now? The answer is to strategically disable it. If one ear is stuck in an awkward position, you can manually move it to a more natural-looking spot (e.g., pointing up or slightly back) and secure it.
A small dab of hot glue or even a cleverly placed safety pin hidden under the fur can lock the ear in place. This turns your animatronic accessory into a static one, but a good-looking static prop is far better than a visibly broken one. This trick ensures your photoshoots and convention appearances are still a success.
Battery and Charging Hacks
Is a dead battery threatening to sideline your cosplay masterpiece? Your adventure isn't over yet. This section is all about creative power solutions to keep you charged and active, from the hotel room to the convention floor.
A cosplay animatronic ears charging issue is one of the most common and frustrating problems, especially mid-event. Low battery warnings can feel like a countdown to doom. But with a few smart hacks, you can manage your power like a pro and ensure your ears stay lively all day long.
The Art of the Quick Battery Swap
For ears with a replaceable battery, a quick swap is your fastest solution. Before your convention, identify the battery type and order a spare. Having a fully charged backup you can pop in during a lunch break is the single best way to guarantee all-day performance. This is the core of any good animatronic ears battery replacement guide.
A pro-tip for cosplayers: Label your batteries ("A" and "B") with a marker. This helps you keep track of which one is fresh and which one needs charging, avoiding confusion in the middle of a crowded event hall. It's a simple organizational hack that prevents major headaches.
Defeating Charging Issues Mid-Event
What if your ears won't charge at all? First, eliminate the variables. As mentioned before, test with a different cable and a different wall adapter. If that doesn't work, the problem might be the power source itself. Overloaded outlets in convention centers or hotels can sometimes fail to provide enough juice.
This is where a portable power bank becomes your most valuable tool. A power bank delivers a stable, consistent voltage, bypassing any issues with wall outlets. One cosplayer at Comic-Con kept her ears alive for an entire Saturday by tucking a small, lipstick-sized power bank into her wig, with a short cable running to the ears. This is the ultimate cosplay tech fix.

Power Banks: Your Convention Lifeline
Not all power banks are created equal. For cosplay tech, you don't need a massive one. A small 5,000mAh bank is lightweight and can typically recharge a set of animatronic ears 2-3 times over. It’s the perfect emergency backup.
When selecting a power bank, look for one with a standard USB-A port, as this is the most versatile for various charging cables. This small investment provides peace of mind that a dead battery won't stop you from interacting with fans or getting that perfect, expressive photo. For a better understanding of the power systems in these accessories, an expert breakdown can be invaluable. For this, the definitive resource is our guide on How Animatronic Ears & Tails Work for Cosplay, which details their mechanics and maintenance.
Last-Minute Aesthetic Fixes
What if a full repair just isn’t in the cards right now? Don’t despair—your cosplay isn’t ruined. This section is about the art of disguise, showing you how to turn a technical glitch into a stylish, intentional choice.
Sometimes, despite your best efforts, a mechanical or electrical fix isn't possible on the convention floor. This is where your creativity as a cosplayer shines. Instead of focusing on what's broken, you can masterfully hide the issue and preserve the look of your character.
Covering a Broken Ear with Clever Styling
This is the fastest and easiest aesthetic fix. Use your wig's hair to your advantage. If one ear is drooping, artfully style a few strands of hair to sweep over it, making it look like a purposeful, wind-swept design choice.
You can also use accessories. A flower clip, a ribbon, or a character-appropriate charm can be pinned to the base of the broken ear. This not only hides the awkward angle but adds a new, interesting detail to your cosplay. Did your character just come from a festival or a battle? Now they have a story.
Disguising Ears as a Static Prop
If both ears are immobile, lean into it. Instead of trying to make them look like they should be moving, pose them in a perfect, static position. Many amazing cosplays use high-quality static ears. The key is to make it look intentional.
Use the mechanical bypass trick mentioned earlier to lock both ears into a symmetrical, alert position. A common misconception is that animatronics are the only way to have great ears. The truth is, a well-made, well-posed static set can look just as good in photos, as proven by a cosplayer whose static ears didn't detract from a winning photoshoot.
Quick Paint Touch-Ups for Damage
If your repair attempts left a scratch or a visible glue mark, a quick touch-up can make all the difference. A black or silver permanent marker can hide a multitude of sins on dark-colored plastics. For colored ears, a bit of matching acrylic paint or even nail polish can cover up a scuff in seconds.
The goal is to eliminate any visual distraction that screams "broken." By concealing the damage, you draw the eye back to your overall performance and the character you’re embodying, ensuring the flaw goes completely unnoticed by 99% of people.
Convention Survival Kit for Cosplay Ears
Want to feel like a superhero, ready to solve any problem? A well-stocked repair kit is your superpower. Let’s build the ultimate anime cosplay repair kit that’s small enough to fit in any bag but powerful enough to save your day.
The best way to handle a cosplay emergency is to be prepared for it. A small, dedicated survival kit for your tech accessories can turn a potential disaster into a minor inconvenience. As one DragonCon veteran says, "My mini glue gun has saved more cosplays than I can count." Here’s what to pack.

Interactive Cosplay Repair Checklist
Check off the items as you pack your ultimate repair kit!
Essential Tools to Carry
- Mini Hot Glue Gun: The number one tool for cosplay repair. It can fix structural breaks, secure loose wires, and lock parts in place.
- Precision Screwdriver Set: A small set with Phillips and flathead bits is crucial for opening battery compartments or ear housings.
- Paperclip: Your secret weapon for hitting tiny reset buttons.
- Small Scissors or a Multi-tool: For cutting tape or trimming materials.
Emergency Supplies Checklist
- Spare Batteries: The most important item on this list.
- Clear Tape & Electrical Tape: For temporary wiring fixes and securing parts.
- Safety Pins: Incredibly versatile for pinning a broken ear to a wig or clothing.
- Permanent Markers (Black & Silver): For quick cosmetic touch-ups on scratches.
- Super Glue: For a more permanent bond than hot glue, but use it carefully.
Backup Styling Options
Sometimes the best tool is a good distraction. Pack a few items that match your cosplay’s aesthetic that can be used to hide a repair or a broken part.
- Ribbons or Fabric Strips: Can be tied around the base of the ears.
- Flower Clips or Charms: Can be clipped on to hide a drooping ear.
- Extra Wig Hair: A small weft of matching hair can be used to conceal almost anything.
Packing this kit gives you a massive confidence boost. You'll know that if something goes wrong, you have a solution ready. To get a head start on what to expect, reviewing a comprehensive guide before you go is a smart move. When planning your kit, the go-to resource is our new guide to Fixing Cosplay Ears: 2025 Troubleshooting & Alternatives, which outlines common failures and helps you anticipate what you'll need.
Preventing Future Ear Breakdowns
Tired of last-minute repairs and want your gear to last? A little preventative care goes a long way. This final section reveals the secrets to keeping your animatronic ears healthy for many conventions to come.
While this guide focuses on emergency fixes, the ultimate goal is to avoid needing them in the first place. With proper care, a quality set of animatronic ears can last for years. One cosplayer reported their ears working perfectly for over two years and four major conventions simply by following these rules.
Proper Storage is Everything
Never just toss your ears into a suitcase or bag. The pressure can damage the delicate mechanisms and wiring. Store them in the original box or a dedicated hard case. If you don't have one, even a sturdy shoebox filled with soft fabric will protect them during travel and storage.
When storing, make sure the ears are in a neutral, relaxed position. Avoid leaving them in an extreme "pinned back" or "alert" state for long periods, as this can put unnecessary stress on the servo motors and internal components.
Perform Regular Calibration
Over time, the movement range of your ears can drift. Most control apps have a calibration function. Run this process before every major event. It resets the neutral position and the maximum range of motion for each ear, ensuring their movements remain smooth, symmetrical, and accurate.
This five-minute process can prevent the gradual strain that leads to servo failure. Think of it like stretching before a workout; it prepares the motors for a long day of expressive movement and is a key part of Cosears troubleshooting.
Avoid Overuse and Listen to Your Tech
Animatronic ears are not designed to be in constant motion for eight hours straight. Give them breaks. Turn them off during panels, while eating, or when you’re just walking around and not actively posing for photos. This allows the motors to cool down and significantly extends their lifespan.
If you start to hear a new sound, like a slight grind or a louder-than-usual buzz, that’s your ears telling you something needs attention. Understanding the technology is the best way to care for it. For an expert-level understanding of how these accessories function, we highly recommend reading our guide: How Animatronic Ears & Tails Work for Cosplay. It provides the foundational knowledge you need for long-term maintenance.
Quick Poll: What Fails Most Often?
Conclusion
A broken piece of gear doesn't have to break your spirit. As we've seen, a last-minute cosplay ears repair is often possible with a bit of ingenuity and a few basic items. From a simple paperclip reset to a clever wiring bypass with tape or a quick battery swap using a power bank, you have the power to solve the problem.
Remember that resourcefulness is at the heart of cosplay. Even if a full fix isn't possible, a creative aesthetic disguise can save your look and keep your confidence high. The same principles often apply to other popular animatronics, which is why it's no surprise to see that from anime cons to everyday fashion, fox tails are trending with similar tech inside. The most important thing is to walk onto that convention floor proud of the character you've brought to life.
Before your next event, take a moment to assemble a small convention survival kit. That little bag of tools and supplies is your best defense against future tech failures. By preparing ahead of time, you ensure that you can spend your convention creating memories, not stressing over repairs.
For more in-depth guides and to explore the latest in animatronic accessories, check out our articles on troubleshooting and tech. To get more DIY cosplay hacks and repair guides delivered directly to your inbox, subscribe to our newsletter today!
Frequently Asked Questions (FAQ)
Why are my animatronic ears twitching but not moving fully?
This often indicates a power delivery issue or a mechanical obstruction. First, ensure your battery is fully charged, as low power can cause weak or incomplete movements. If the battery is fine, gently check the ear's pivot point for any tangled fur or debris that might be restricting its range of motion.
Can I use any USB-C cable to charge my cosplay ears?
While most USB-C cables will work, it's best to use the one provided by the manufacturer or a high-quality, data-capable cable. Some low-quality "charge-only" cables may not deliver a stable current, leading to a cosplay animatronic ears charging issue or incomplete charging. If you're having trouble, swapping to a different, reliable cable is a great troubleshooting step.
How do I fix Cosears Bluetooth connection issues on Android?
If you're facing Cosears Bluetooth connection issues, start by clearing the app's cache in your Android settings (Settings > Apps > Cosears > Storage > Clear Cache). Next, go to your Bluetooth settings, "Unpair" the ears, restart your phone, and then try pairing them again. This cycle resolves most connection conflicts.
What's the best glue for a last-minute cosplay ears repair?
For a fast, non-permanent fix that you might want to undo later for a proper repair, a mini hot glue gun is your best friend. It sets quickly and can be peeled off. For a stronger, more permanent bond on a broken plastic piece, a gel-type super glue (cyanoacrylate) is ideal, as it won't run and provides a very strong hold once cured.