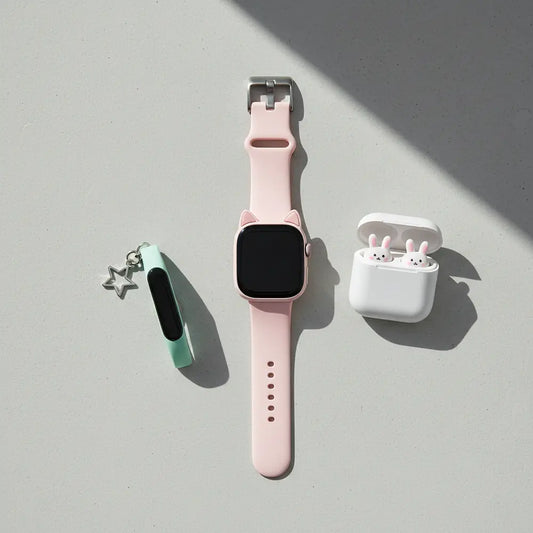
Seamless Cosplay Ears: No Headband Solutions
Seamless Cosplay Ears: No Headband Solutions
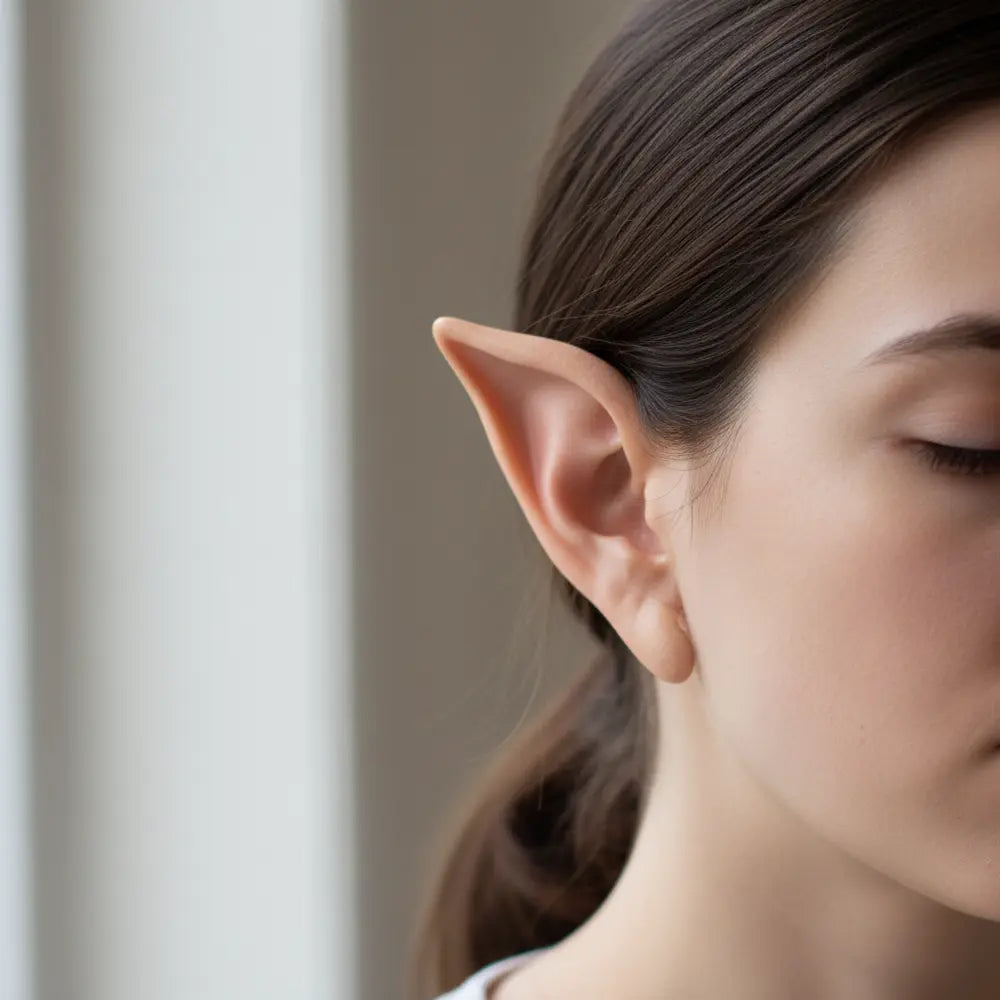
Every serious cosplayer knows the struggle. You spend weeks perfecting your costume, the wig is styled flawlessly, and the makeup is impeccable. But then, you put on your elf ears, and a clunky plastic headband shatters the entire illusion. It’s a frustrating detail that can ruin photos and break character. What if you could ditch it completely?
That visible band isn't just a visual problem. It can cause headaches after hours of wear at a convention and slip at the worst possible moments. Achieving a look where your ears seem to naturally emerge from your hairline feels like a secret reserved only for professional SFX artists. But it’s not.
This is your backstage pass to pro-level cosplay ear hacks. We will explore every proven method for achieving truly seamless cosplay ears. From skin-safe adhesives and hyper-realistic prosthetics to emerging magnetic tech and clever DIY solutions, this is your definitive 2025 guide to making your character come to life, headband-free.
Why Cosplay Ears Without Headbands Matter in 2025
Ever look at a cosplay photo and get distracted by a visible, glossy headband peeking through the wig?
This section explains why ditching the headband isn't just a preference—it's a crucial step toward achieving professional-level realism and comfort in modern cosplay.
In today's cosplay scene, realism is king. High-resolution cameras and close-up photography mean every detail matters. A headband is an instant giveaway that your ears are an accessory, not a part of you. This small detail can be the difference between a good cosplay and a breathtakingly believable character transformation.
The discomfort is also a major factor. Conventions are marathons, not sprints. A tight headband pressing against your head for eight or more hours can lead to significant pain. This distraction pulls you out of the experience, forcing you to adjust your gear instead of enjoying the event. Cosplay ears no headband solutions prioritize long-term wearability.
Finally, the materials and techniques available to cosplayers are evolving rapidly. What was once limited to basic spirit gum has expanded into a world of specialized adhesives, flexible silicones, and even magnetic attachments. Embracing these methods allows you to elevate your craft and create a more polished, integrated final look.
Adhesive-Based Seamless Cosplay Ears
Tired of glues that fail halfway through a convention or leave your skin red and irritated?
Here, we break down the most reliable adhesives—from spirit gum to medical-grade options—so you can choose the right one for your skin and your cosplay's demands.
Adhesives are the classic method for a reason: when applied correctly, they offer incredible hold and a nearly invisible finish. The key is knowing which type to use for your specific needs, as they vary widely in strength, flexibility, and skin safety. Always perform a patch test 24 hours before your event to check for any allergic reaction.
Types of Adhesives
The three most common choices for attaching elf ear prosthetics or other small appliances are spirit gum, prosthetic adhesive, and medical tape. Each has distinct advantages and disadvantages.
-
•Spirit Gum: This is the old-school, resin-based standard. It's affordable and widely available. However, it can be less durable against sweat and oils, potentially losing its grip during a long, active day. It's best for short photoshoots or less strenuous wear.
-
•Prosthetic Adhesive: This is a step up. Products like Pros-Aide or Telesis are silicone-based and designed for the film industry. They provide a much stronger, more flexible, and water-resistant bond that can easily last an entire convention day. They are the best adhesives for cosplay ears no headband applications.
-
•Medical Tape: Options like Topstick or other toupee tapes offer a mess-free alternative. This double-sided tape is designed for skin contact and provides a solid hold. It's an excellent choice for those with very sensitive skin or for heavier latex ears that need extra support without liquid glue.

Application and Removal Safety
Proper technique is essential for both a secure attachment and skin safety.
- Clean the Skin: Use an alcohol wipe to clean both your skin and the inside of the prosthetic ear. This removes oils and ensures a strong bond.
- Apply a Thin Layer: Apply a thin, even layer of adhesive to both surfaces. Let it get tacky—this is a crucial step that many beginners miss.
- Press and Hold: Carefully position the ear and press it firmly into place, holding for at least 30-60 seconds to secure the bond.
- Safe Removal: Never just pull the ear off. Use the specific remover designed for your adhesive (e.g., spirit gum remover, Pros-Aide remover). Apply it with a cotton swab along the seam and let it dissolve the glue gently.
| Adhesive Type | Typical Wear Time | Skin Sensitivity | Removal Difficulty | Best For |
|---|---|---|---|---|
| Spirit Gum | 2-4 Hours | Moderate | Easy | Short photoshoots, lightweight ears |
| Prosthetic Adhesive | 8-12+ Hours | Low (Latex-Free) | Moderate | All-day con wear, active cosplay |
| Medical/Toupee Tape | 6-10 Hours | Very Low | Easy | Sensitive skin, heavier prosthetics |
Silicone & Latex Prosthetics: Realistic Alternatives
Have you ever wondered how some cosplayers have ears that seem to melt perfectly into their skin?
This section reveals the magic behind high-grade prosthetics, comparing the benefits of modern silicone and classic latex for achieving an unbelievably natural look.
While adhesives provide the attachment, the ear prosthetic itself is what sells the illusion. The material, shape, and especially the edges of the prosthetic determine how seamless it can truly be. For realistic cosplay elf ears no headband, investing in a quality prosthetic is non-negotiable.
Lightweight Silicone vs. Classic Latex
Your two main material choices are silicone and latex. While both can work, they offer very different results.
-
•Latex Cosplay Ears: Latex is the traditional material. It's inexpensive and lightweight, making it a great entry point. However, the edges are often thicker, making them more difficult to blend seamlessly. Latex can also degrade over time and cause allergic reactions in some individuals.
-
•Encapsulated Silicone Prosthetics: This is the gold standard for realism. These prosthetics are made from a soft, skin-like silicone and feature ultra-thin, dissolvable edges made of a plastic cap material. When you apply acetone to the edges, they melt away, creating a flawless transition from the prosthetic to your skin.
A common misconception is that silicone prosthetics are always heavy. Modern formulas are surprisingly lightweight and flexible, moving more naturally with your facial expressions than rigid latex. The realism they provide, especially for close-up photography, is unmatched.

Durability and Reusability
A well-cared-for pair of silicone ears can be reused dozens of times, making the higher initial cost a worthwhile investment for a serious cosplayer. Latex ears are less durable and may tear or warp after a few uses, especially during removal.
To maximize the life of your prosthetics, always clean them thoroughly after use. Gently remove all adhesive residue with the appropriate remover and store them in a cool, dark place, lightly dusted with powder to prevent them from sticking to themselves.
Magnetic & Clip-On Innovations (2025 Updates)
Are you worried about skin irritation from adhesives or the hassle of daily application and removal?
Welcome to the future of cosplay ears. This section explores the exciting world of magnetic and clip-on systems that offer a secure, reusable, and completely glue-free solution.
The cosplay community is constantly innovating, and 2025 is the year of adhesive-free attachments. For those seeking a quick, comfortable, and endlessly reusable option, magnetic cosplay ears and advanced clip-on designs are a game-changer. These methods are perfect for cosplayers who switch characters frequently or dislike dealing with glues.
How Magnetic Systems Work
The concept is simple but effective. A powerful, skin-safe neodymium magnet is secured to the inside of the cosplay ear. A second magnet is then placed on the back of your real ear. The attraction between the two holds the prosthetic firmly in place. Some advanced systems even use a thin, clear filament that hooks over the top of your ear for added security.
A great example is "Anya the Rogue," a cosplayer known for her dynamic fighting poses. At a recent convention, she used magnetic elf ears for her wood elf ranger. The magnets were strong enough to hold through acrobatic movements for photos but allowed her to pop them off instantly during breaks, preventing discomfort.

This kind of innovation is transforming cosplay accessories. While magnetic ears focus on static attachment, other technologies are bringing characters to life in new ways. If you're fascinated by how technology enhances cosplay, you might be interested in exploring the mechanics behind animatronics. For instance, discover the adorable tech behind accessories that react to your expressions and learn what are moving cat ears and how they work.
Lightweight Clip-On Designs
Modern clip-ons have evolved far beyond the clunky, painful clips of the past. New designs use soft, flexible materials and contoured shapes that hug the cartilage of the ear. They distribute pressure evenly, allowing for hours of wear without pinching. These are a fantastic option for fairy ear attachments that are often delicate and ornate.
Pros and Cons for Active Cosplay
These innovative solutions offer incredible convenience, but it's important to understand their limitations.
Pros:
- Extremely Fast: Application takes seconds, not minutes.
- Zero Skin Irritation: No adhesives mean no risk of allergic reactions.
- Infinitely Reusable: Magnets and clips don't wear out like glue does.
Cons:
- Security Risk: A hard knock or snag can dislodge the ear.
- Weight Limit: Very heavy ears might be too much for these methods.
- Less "Seamless": May not offer the perfectly blended edge of prosthetics.
What's Your Go-To Seamless Ear Technique?
DIY Seamless Cosplay Ear Tutorials
Do you love the satisfaction of making your own props but aren't sure how to create ears without a headband?
This section is your complete workshop. We'll guide you through crafting custom, seamless ears using budget-friendly materials and clever attachment techniques you can master at home.
Creating your own DIY cosplay ears without headband is incredibly rewarding. It gives you full control over the shape, size, and color, ensuring a perfect match for your character. With a few accessible materials and some patience, you can achieve a professional look on a budget.
Crafting Ears from Foam, Clay, or Thermoplastics
The base of your ear can be made from several common crafting materials.
-
EVA Foam or Foam Clay: This is a cosplayer's best friend. It's lightweight, easy to shape, and can be textured to look like skin. You can build a base shape and then use a Dremel or sandpaper to refine it.
-
Thermoplastics (e.g., Worbla): These materials become pliable when heated and hold a rigid shape when cool. They are excellent for creating durable, detailed ears. You can press them into molds or shape them by hand.
A pro-tip for foam is to seal it with several layers of a flexible primer before painting. This fills in the pores and creates a smooth, non-absorbent surface that looks much more like skin.
Attachment Through Wig Integration
One of the best cosplay ear hacks for a seamless look is to build the attachment directly into your wig.
- Create an Anchor Point: Sew a small, sturdy piece of fabric or a worbla scrap onto the inside of your wig cap, right above where your ear will be.
- Attach the Ear: Use a strong adhesive like E6000 or even stitch the base of your DIY ear directly to this anchor point. The ear will now appear to emerge from under the hairline.
- Use Hair to Hide: Style the wig's hair fibers to flow naturally around the base of the ear, completely hiding any connection points.
This method provides incredible security and looks fantastic in photos. For even more advanced and clever methods, exploring a dedicated guide on the topic is a great next step. For a deeper dive into these techniques, the go-to resource is our article on DIY Hacks to Attach Cosplay Ears Without a Headband.
Budget-Friendly Solutions
Don't have a big budget? A common misconception is that DIY automatically means lower quality. You can create amazing ears with simple liquid latex and tissue paper. By building up layers over a wire frame, you can sculpt custom shapes that are both lightweight and perfectly formed to your own ear.
Blending & Styling Hacks for a Natural Finish
Does a visible seam or a slight color mismatch between your skin and your prosthetic ear ruin the effect?
Let's make that line disappear. This chapter provides the essential makeup and styling techniques that professionals use to create a truly flawless, photo-ready finish.
Attaching the ear is only half the battle. The true artistry lies in the blending process. These techniques are what separate amateur cosplay from professional-grade work, ensuring your seamless cosplay ears look real even under the scrutiny of a camera flash. The goal is to trick the eye into seeing no separation between you and your character.
Makeup Blending Techniques
The secret to a perfect blend is layering. You can't just put your foundation over the ear and call it a day.
- Color Correction: The edge where the prosthetic meets your skin can sometimes have a reddish or dark shadow. Use a green or peach color corrector to neutralize this before applying any foundation.
- Stippling, Not Wiping: Use a damp makeup sponge to gently stipple or bounce your foundation over the seam. Wiping or rubbing can lift the edge of the prosthetic. Build up thin layers until the color is uniform.
- Use PAX Paint or Alcohol-Activated Makeup: For ultimate durability, consider using PAX paint (a mix of prosthetic adhesive and acrylic paint) or alcohol-activated makeup on the prosthetic itself. This creates a sweat-proof, smudge-proof finish that won't budge all day.
- Set with Translucent Powder: Once you are happy with the blend, generously apply a translucent setting powder over the entire area. This will lock everything in place and eliminate any shine from the adhesive or makeup.

Hiding Seams with Wigs and Hair
Your wig is your most powerful tool for hiding the upper seam of your cosplay ears. When positioning your prosthetic, tuck the top edge just slightly under the hairline of the wig. This instantly hides the thickest part of the appliance.
From there, strategically pull a few fine strands of hair from the wig and arrange them to fall naturally over and around the front of the ear. This small detail breaks up any remaining visible line and creates the illusion that the ear is growing from beneath the hair. Learning how to blend cosplay ears with hair is a critical skill.
Photo-Ready Finishing Touches
To take your prosthetic blending makeup to the next level, think about adding subtle, realistic details. Use a fine brush and some light brown or pink eyeshadow to add a bit of contouring and depth to the inner parts of the prosthetic ear. This small touch adds a surprising amount of dimension and life to the final look.
Convention Survival: Securing Your Ears for Long Wear
Are you constantly worried that a bump in the crowded dealer's hall will send your perfectly placed ear flying?
This is your definitive guide to ensuring your ears stay put from the opening ceremony to the late-night panels, including what to pack for on-the-go emergencies.
A convention is an endurance test for any cosplay. Between crowded hallways, long photo lines, and active panels, your gear needs to be locked down. When it comes to cosplay ears no headband methods, choosing the right long-wear adhesive and being prepared for quick fixes is absolutely essential for a stress-free day.
The Best Adhesives for 8+ Hours
For a full day of wear, you need an adhesive that can stand up to sweat, oil, and movement. Your best bet is a medical-grade silicone adhesive like Telesis or the community-favorite Pros-Aide. These are designed for performance and will give you the peace of mind that your ears are secure. Spirit gum is simply not reliable enough for this kind of extended wear.
A critical pro-tip is to apply a barrier cream or spray to your skin before the adhesive. This protects your skin from irritation and can also improve the bond by creating a uniform, non-oily surface for the glue to stick to.
While securing your ears is key, don't forget other accessories that complete your look. The trend of wearable animal features is growing, moving beyond just ears. To understand another popular element in this space, explore our guide on why fox tails are trending both at conventions and in everyday fashion.
Your Cosplay Ear Survival Kit
Never leave for a con without a small touch-up kit. A small pouch with these items can save your cosplay from a mid-day disaster.
- Your Chosen Adhesive: A small vial for reapplying a lifted edge.
- Q-tips or Small Brushes: For precise application of glue.
- Adhesive Remover: In case you need to completely reset an ear.
- Alcohol Wipes: To clean skin and prosthetics before re-gluing.
- Translucent Powder & a Small Puff: To re-blend and set any touch-ups.
- A Small Mirror: Essential for seeing what you're doing.
Safety and Removal at the End of the Day
After a long day, it can be tempting to just rip the ears off, but this can cause serious skin irritation or damage your prosthetics. Be patient.
Generously apply the correct remover along the seams and let it sit for a minute. You should feel the adhesive loosen. Gently work a Q-tip soaked in remover under the edge, continuing to apply more remover as you slowly peel the prosthetic away from the skin. Never force it.
Choosing the Best Method for You
Feeling a bit overwhelmed with all the options, from glue and latex to magnets and foam?
This final section simplifies your decision. We'll help you pinpoint the perfect method by weighing the trade-offs between budget, realism, comfort, and your specific cosplay needs.
There is no single "best" way to attach seamless cosplay ears; the right choice depends entirely on you. By considering your priorities, you can confidently select the technique that will give you the best results and the most enjoyable convention experience.
Solution Finder: What's Your Priority?
Answer a few questions to find your perfect method.
1. What matters most: Ultimate Realism or Ultimate Convenience?
For a side-by-side analysis to help you finalize your choice, our comprehensive Seamless Cosplay Ears: DIY vs Store-Bought guide breaks down the costs, time commitment, and results you can expect from each path.
| Method | Realism | Cost | Comfort | Security |
|---|---|---|---|---|
| Adhesive + Latex | Good | Low | Moderate | Good |
| Adhesive + Silicone | Excellent | High | High | Excellent |
| Magnetic System | Very Good | Moderate | Excellent | Moderate |
| Wig Integration (DIY) | Good-Excellent | Low | High | Very Good |
Ultimately, achieving a believable character is a journey of experimentation. Don't be afraid to try different methods. With the techniques in this guide, you now have the knowledge to move beyond bulky headbands and master the art of the truly seamless cosplay ears.
Frequently Asked Questions (FAQ)
1. How do I stop my prosthetic ears from looking shiny on camera?
The shine usually comes from adhesive residue or oily makeup. The best way to combat this is to use a generous amount of translucent setting powder. Use a powder puff to press it firmly over the prosthetic and the surrounding skin, then brush away the excess. This matte finish will diffuse light and look much more natural in photos.
2. What's the best way to attach cosplay ears if I have very sensitive skin?
If you have sensitive skin, avoid liquid adhesives like spirit gum and even some prosthetic glues. Your safest options are mechanical. Try high-quality, skin-safe medical tape like Topstick, or explore the newer magnetic and clip-on ear systems. Attaching the ears directly to your wig is another excellent, no-contact method.
3. Can I reuse latex cosplay ears? How many times?
Yes, you can reuse latex ears, but their lifespan is limited. With careful removal and cleaning, you can typically get 3-5 wears out of a single pair. Latex is prone to tearing at the thin edges and can be damaged by oils in skin and removers. For long-term reusability, silicone is a far more durable investment.
4. My elf ears are really heavy. Will magnets be strong enough to hold them?
For heavy or oversized ears (like some creature or monster designs), magnets alone might not be enough and could get knocked off easily. For heavier pieces, your most secure option is a strong prosthetic adhesive combined with a mechanical support, like a thin, clear elastic band hidden in your hair or attached to your wig.