DIY vs Store-Bought Moving Cosplay Tails
You’ve perfected your anime costume, polished your armor, and styled your wig. But one crucial detail is missing: a tail that actually moves. At a bustling convention, it's the twitch, the sway, and the wag that truly bring a character to life and stop people in their tracks. This brings every cosplayer to a critical crossroads: do you build one or buy one?
This isn't just a question of money. It's a debate about time, skill, and creative vision. Many guides show you a build, and others review products, but few put them head-to-head. This guide does exactly that. We'll explore the path of a DIY moving furry tail tutorial and compare it directly against the convenience of a store-bought animatronic cosplay tail.
By the end, you'll have total clarity on which option is truly best for your goals, your budget, and your next big event. You’ll understand the cost-effectiveness, the quality you can expect, and the effort required for both routes, empowering you to make the perfect choice for your cosplay.
Should You DIY or Buy Your Cosplay Tail?
Answer a few quick questions to find your perfect path!
1. Which statement best describes your timeline?
Why Moving Tails Are a Game-Changer in Cosplay
The difference between a static prop and an animatronic one is the difference between a photograph and a film. A moving tail adds a layer of realism and personality that a simple plush accessory can't match. It communicates mood—a happy wag, an agitated flick, or a curious twitch—transforming you into the character, not just someone wearing the costume.
This dynamic element is an attention magnet. At a crowded anime convention, a cosplay furry tail with wagging motion draws eyes and cameras. It creates interactive moments with attendees and turns a simple photo opportunity into a memorable experience. More than 70% of cosplay competition judges cite "character embodiment" as a deciding factor, and lifelike movement is a powerful way to demonstrate that.
Consider the impact during photoshoots. A tail that can be posed or remotely activated allows for a much wider range of expressive shots. A cosplayer portraying a fox spirit, for instance, might win over judges not just with their costume's accuracy, but with the subtle, lifelike flick of their nine tails, each moving independently. It's this level of detail that defines next-level cosplay.

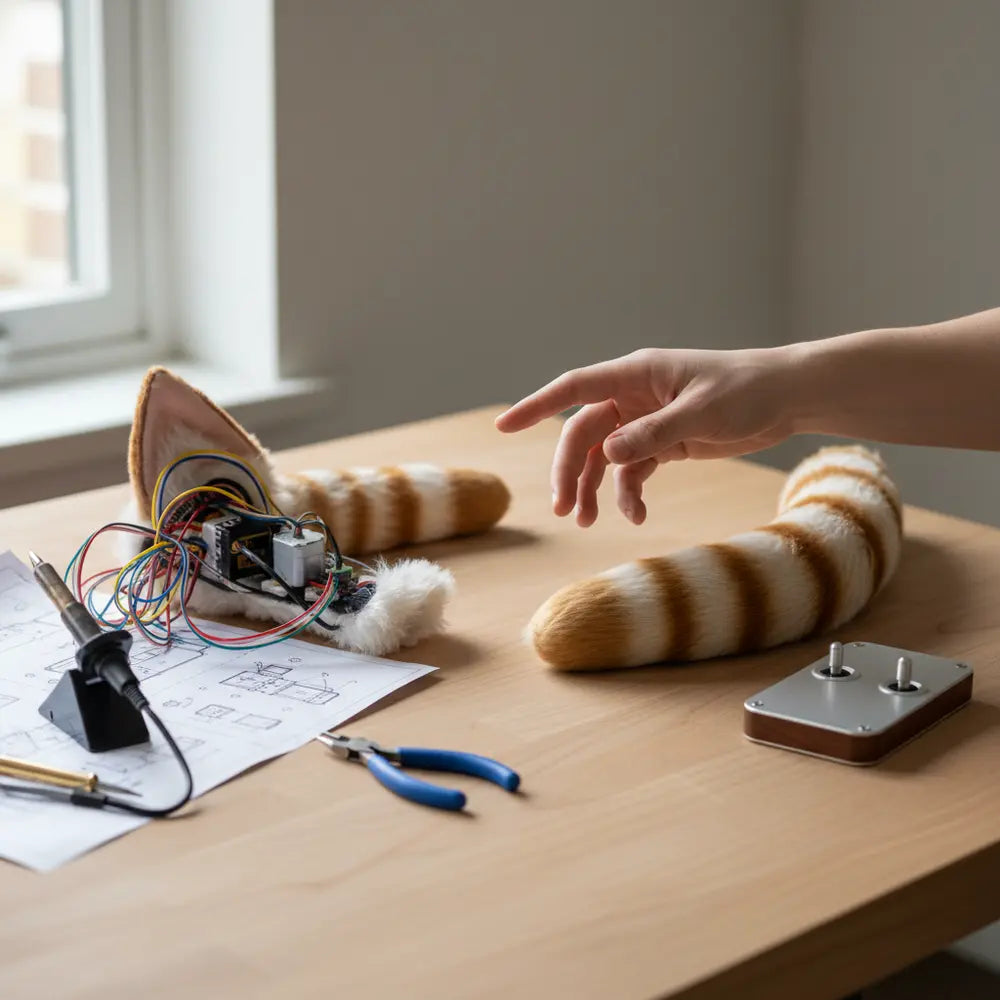
DIY Moving Furry Tail Tutorial
Building your own remote control cat tail cosplay accessory is an incredibly rewarding project for any maker. It gives you complete control over the final product, from its shape and size to its exact movements. While a full schematic is complex, the core process can be broken down into manageable steps.
Required Materials & Tools
Your shopping list will vary based on your design, but most builds require these core components:
- The Skeleton: Flexible spine segments (often 3D printed or made from plastic tubing) and servo motors to create articulation points.
- The Electronics: A microcontroller (like an Arduino), a battery pack, wiring, and a wireless remote control unit.
- The Skin: High-quality faux fur, a sewing kit, and a strong fabric base to house the electronics.
- Assembly: A hot glue gun, zip ties, and basic soldering equipment.

A Simplified Step-by-Step Process
- Construct the Skeleton: Assemble your spine segments, integrating small servo motors at key joints where you want the tail to bend. This forms the mechanical core.
- Wire the Electronics: Connect the servos to your microcontroller and link it to the power source and the remote receiver. This is the most technical phase.
- Program the Motion: Write or upload code to the microcontroller to translate signals from your remote into servo movements. Start with simple left-right and up-down motions.
- Create the Fur Cover: Sew a "sleeve" from your faux fur that is slightly larger than the mechanical skeleton. Attach it securely, ensuring it doesn’t snag on the moving parts.
- Test and Refine: Power it on and use the remote to test the motion. Adjust the code or mechanics to get the smooth, realistic movement you want.
Estimated Cost and Time
A common misconception is that DIY is always dramatically cheaper. For a student on a tight budget, it's possible to build a simple, effective moving tail for under $50 using basic servos and materials. However, a more advanced realistic cosplay tail with remote control features can easily cost $100-$150 in parts alone.
The real investment is time. A first-time builder should budget 20-30 hours for research, assembly, and troubleshooting. Even experienced makers often spend a full weekend perfecting their build.
A summary can only get you so far. For a complete walkthrough with wiring diagrams, code snippets, and maker hacks, our definitive resource is the perfect place to start your build.
Read the DIY Animatronic Cosplay Tail TutorialPros and Cons of DIY Moving Tails
The DIY route is a journey with high highs and low lows. Understanding the trade-offs is essential before you commit your time and money. It's the ultimate path for customization but demands a specific mindset and skillset.
The Pros: Creative Freedom and Lower Costs
- Unlimited Customization: You control everything—the length, thickness, fur color, and even the type of wag. Want a nine-tailed fox look? Or a tail that lights up? DIY makes it possible.
- Cost-Effectiveness: While not free, the material cost for a DIY tail is almost always lower than buying a premium pre-made one. This makes it one of the more affordable animatronic cosplay tail options if you have the time.
- The Maker's Pride: There is immense satisfaction in saying, "I made this." A self-built piece of wearable tech is a testament to your skill and dedication to your craft.
The Cons: Time, Skill, and Durability Risks
- Significant Time Investment: As mentioned, expect to invest dozens of hours. A cosplayer rushing before a convention found her DIY tail failed mid-event, a regret that overshadowed her hard work. Time pressure is the enemy of quality builds.
- Technical Skill Required: You need a basic understanding of electronics, soldering, and possibly coding. Without it, the learning curve can be steep and frustrating.
- Durability Can Be a Gamble: The tail's resilience depends entirely on your build quality. A poorly soldered wire or a weak joint can fail at the worst possible moment, like during a cosplay competition.
Store-Bought Animatronic Cosplay Tails: What to Expect
For those who prioritize convenience and a guaranteed level of quality, a store-bought animatronic cosplay tail is the clear winner. The market for these animatronic costume accessories has matured, offering a range of products that cater to different needs and budgets.
Key Features and Technology
Modern store-bought tails are more than just wiggling props; they are sophisticated pieces of wearable tech cosplay. Common features include:
- ● USB-C Charging: No more scrambling for AA batteries. Most premium tails come with rechargeable internal lithium-ion batteries that last for hours.
- ● Pre-Programmed Motions: Out of the box, you get a variety of realistic movements—slow sways, excited wags, and playful twitches—all selectable from a remote.
- ● Bluetooth Connectivity: Some high-end models can connect to a smartphone app, allowing for fully custom motion sequences or even reactive movements tied to your phone's motion.
Understanding the Price Tiers
Not all store-bought tails are created equal. The price often reflects the smoothness of motion, durability, and feature set.
- ● Budget Tier ($70 - $150): These tails offer basic remote-controlled movements. The motion might be a bit more robotic, and the fur quality may be standard. They are a great entry point.
- ● Mid-Tier ($150 - $300): Here you’ll find the best remote control furry tail for cosplay for most users. They feature smoother, multi-joint articulation, better battery life, and higher-quality materials.
- ● Premium Tier ($300+): These are professional-grade props. Expect ultra-realistic, silent motion, app integration, and durable construction designed for heavy use at conventions and performances. One popular model is consistently rated highest for its incredibly fluid, cat-like motions, making it a favorite for anime cosplays.

Pros and Cons of Store-Bought Tails
Choosing a store-bought tail is a trade-off between money and time. It offers a reliable, polished experience right out of the box, but that convenience comes at a price—both financially and creatively.
The Pros: Convenience and Reliability
- Plug-and-Play: The biggest advantage is convenience. You can have a fully functional, high-quality moving tail within minutes of opening the box. No soldering, no coding, no stress.
- Professional Quality and Durability: These tails are designed and tested for performance. They feature robust internal mechanics and a polished finish that is difficult to replicate with a first-time DIY build.
- Reliable Performance: A cosplayer who upgraded from a fussy DIY tail to a premium store-bought one praised its reliability. It worked flawlessly through a three-day convention, allowing her to focus on performing, not fixing.
The Cons: Cost and Limited Customization
- Higher Upfront Cost: A good store-bought tail is an investment. The price can be a significant barrier for students or hobbyists on a tight budget compared to the material cost of a DIY project.
- Limited Creative Control: You are limited to the designs, colors, and motions offered by the manufacturer. It's harder to create a tail for a truly unique or obscure character.
- "Off-the-Shelf" Feel: While high-quality, a store-bought tail may be worn by other cosplayers, potentially reducing the uniqueness of your overall look.
Side-by-Side Comparison: DIY vs Store-Bought
Choosing between a DIY moving furry tail tutorial and a store-bought animatronic cosplay tail comes down to five key factors. Seeing them laid out side-by-side makes the decision clearer. Let's break down how they stack up against each other.
| Feature | DIY Moving Tail | Store-Bought Animatronic Tail |
|---|---|---|
| Total Cost | $50 - $150+ (in materials). The final cost depends heavily on the complexity and quality of the components you choose. | $70 - $300+. A significant upfront investment, but the price is fixed and includes all necessary parts. |
| Time Investment | Very High (20-40+ hours). Includes research, building, and extensive troubleshooting. Not ideal for tight deadlines. | Very Low (Under 1 hour). Unbox, charge, and wear. The time saved is a major selling point. |
| Required Skill | Intermediate to Advanced. Requires comfort with electronics, basic fabrication, and potentially coding. | Beginner. If you can operate a remote control, you can use the tail. No technical skill is needed. |
| Customization | Infinite. Your imagination is the only limit. You control size, shape, fur, and movement patterns completely. | Limited. You are restricted to the manufacturer's designs, though some modification is possible (see next section). |
| Reliability | Variable. Depends entirely on your build quality. Can be very robust or prone to failure under stress. | High. Professionally manufactured and tested for consistency and durability during typical convention use. |
Best Choice Scenarios
- The Student on a Budget: A creative student with more time than money is the perfect candidate for a DIY project. The process of building a remote control cat tail cosplay piece is a valuable learning experience, and the lower material cost makes it accessible.
- The Professional Cosplayer: A serious cosplayer who competes or does commissioned work should lean toward a premium store-bought tail. The reliability and professional finish are worth the investment, ensuring their performance is never compromised by technical failure.
Customization and Upgrades
Your tail doesn't have to stay in its original state. Both DIY and store-bought options can be a canvas for further creativity. A few thoughtful upgrades can elevate your robotic cosplay tail from a cool accessory to a signature piece of your costume.

How to Modify a Store-Bought Tail
Even with limited options, you can add a personal touch.
- ● Create a New Fur Cover: Carefully remove the original fur "sleeve" and use it as a pattern to sew a new one from a different color or type of faux fur. This is the easiest way to match your tail to a specific character design.
- ● Airbrushing and Dyeing: For subtle color shifts or patterns like stripes and spots, use fabric-safe airbrush paint or dye to customize the existing fur.
Ideas for DIY Enhancements
If you built your own tail, the sky's the limit for upgrades.
- ● Integrate LED Lights: Weave addressable LED strips like NeoPixels into the tail's spine to create glowing effects, pulses, or color changes you can trigger with your remote. An LED-enhanced tail looks spectacular at a rave or Halloween event.
- ● Add Haptic Feedback: Install a small vibration motor at the base of the tail to create a "purring" effect that syncs with certain movements.
- ● Sound Reactivity: For advanced makers, add a microphone sensor that makes the tail twitch or wag in response to loud noises or music.
Maintenance and Lifespan Tips
Whether built or bought, treat your animatronic tail with care. Always brush the fur after use to prevent matting. Keep the electronic components dry and store the tail in a safe place where it won't be crushed. Regularly check battery connections and moving parts for wear and tear.
Final Buying & Building Tips
You have the data and the pros and cons. Now it’s time for action. Making the right choice involves a little bit of planning and knowing where to look for reliable resources. Use this final checklist to guide your decision on whether to build a DIY moving furry tail or purchase a polished store-bought animatronic cosplay tail.
How to Budget for Your Tail
When budgeting for a DIY project, always add 20% to your estimated cost for unexpected needs—a burnt-out motor, extra wiring, or better tools. For a store-bought tail, decide on your "must-have" features first. If smooth motion is non-negotiable, it's better to save for a mid-tier model than to be disappointed by a budget one.
Where to Find Reliable Resources
The internet is full of advice, but quality varies.
- ● For DIY Builders: Start with dedicated maker communities like Instructables and the RPF (Replica Prop Forum). These sites have experienced builders who share detailed logs and troubleshoot problems.
- ● For Buyers: Look for video reviews on YouTube that show the tail in motion from multiple angles. Pay attention to reviews on platforms like Etsy and Amazon that mention battery life and durability after a few uses.
For builders seeking the latest techniques, a modern guide is your best starting point. Our tutorial integrates 3D printing and Arduino for a truly future-proof project.
View the DIY Electric Moving Tail GuideYour Final Decision Checklist
Ask yourself these three questions:
- What is my absolute deadline? If your event is less than a month away, buying is the safer option.
- What is more valuable to me right now: my time or my money? Be honest about your current priorities.
- Do I enjoy the process of building and tinkering? If problem-solving electronics sounds like fun, go DIY. If it sounds like a nightmare, go with a store-bought animatronic cosplay tail.
Your answer will point you to the perfect choice for your needs.
Your Tail, Your Choice
Ultimately, there is no single "best" option. The right path depends entirely on you—your budget, your timeline, and your passion for creating. A DIY moving furry tail is a badge of honor, a testament to your skill and creativity. A store-bought animatronic cosplay tail is a reliable tool that lets you focus on performance and engagement.
Both paths lead to a more dynamic and impressive cosplay. The goal is to choose the one that brings you the most joy and the least stress. Now that you're equipped with the knowledge, you can confidently invest in the tail that will bring your next character to life.
For more inspiration on how to integrate unique accessories into your look, check out our article on why fox tails are trending beyond conventions. And if you're curious about other animatronics that can elevate your costume, see our guide on the clever tech behind moving cat ears.
We'd love to see what you create or choose! Share your cosplay tail photos with us on social media for a chance to be featured.
Frequently Asked Questions
1. How long does a DIY moving tail's battery usually last?
A typical DIY setup using a standard hobbyist battery pack (e.g., a 2000mAh LiPo) will generally last 2-4 hours with continuous movement. Battery life depends heavily on the number of servos, the weight of the tail, and how actively you use it. For all-day convention wear, consider building a system with an easily swappable battery pack.
2. Can I make a realistic cosplay tail with a remote control waterproof?
Making a fully waterproof animatronic tail is extremely difficult and not recommended for most builders. The electronic components, especially the servo motors and controller, are sensitive to moisture. At best, you can make it water-resistant by sealing the electronics in a plastic case and using high-quality, dense fur that repels light moisture. Avoid wearing it in heavy rain.
3. What's the best remote control furry tail for cosplay if I'm a beginner?
If you're a beginner looking to buy, your best bet is a mid-tier, pre-made tail. These models offer a great balance of smooth motion, reliability, and price. They eliminate the technical frustration of a DIY build while providing a high-quality product that will last through many events, making them a fantastic first investment in robotic cosplay tails.
4. Is a store-bought animatronic cosplay tail heavy to wear?
Weight varies by model, but most high-quality store-bought tails weigh between 1 to 3 pounds (0.5 to 1.4 kg). They are designed with a comfortable and secure belt clip or harness system that distributes the weight effectively across your lower back. While you'll notice it's there, it shouldn't be uncomfortable for extended wear at a convention.